So, you're setting up your new home, huh? Exciting times! Especially for first-time homeowners or those of us squeezing into a BTO flat, space is *always* a concern. And when it comes to creating a functional workspace, the humble computer table often gets overlooked. But what if you could have a computer table that perfectly fits your needs, your space, *and* your budget? That's where the magic of DIY comes in!
Forget those generic, mass-produced tables from the big furniture stores. We're talking about crafting a custom computer table that's uniquely *you*. Think about it: a desk that's exactly the right height, depth, and width for your monitor, keyboard, and all your other gadgets. A table that seamlessly integrates into your existing décor, reflecting your personal style. Best of all, a project that can potentially save you a significant chunk of change. Sounds good, right?
This isn't about becoming a master carpenter overnight. DIY computer tables can range from super simple projects using pre-cut materials to more ambitious builds involving woodworking skills. The key is to choose a project that matches your skill level and available time. And trust me, the satisfaction of building something with your own two hands is totally worth it. Plus, you get bragging rights, *confirm* can!
Okay, let's talk money. One of the biggest draws of DIY is the potential for cost savings. But before you dive headfirst into your computer table project, it's crucial to carefully evaluate the cost-effectiveness of different materials. After all, you don't want to end up spending more than you would on a ready-made table, *leh*.
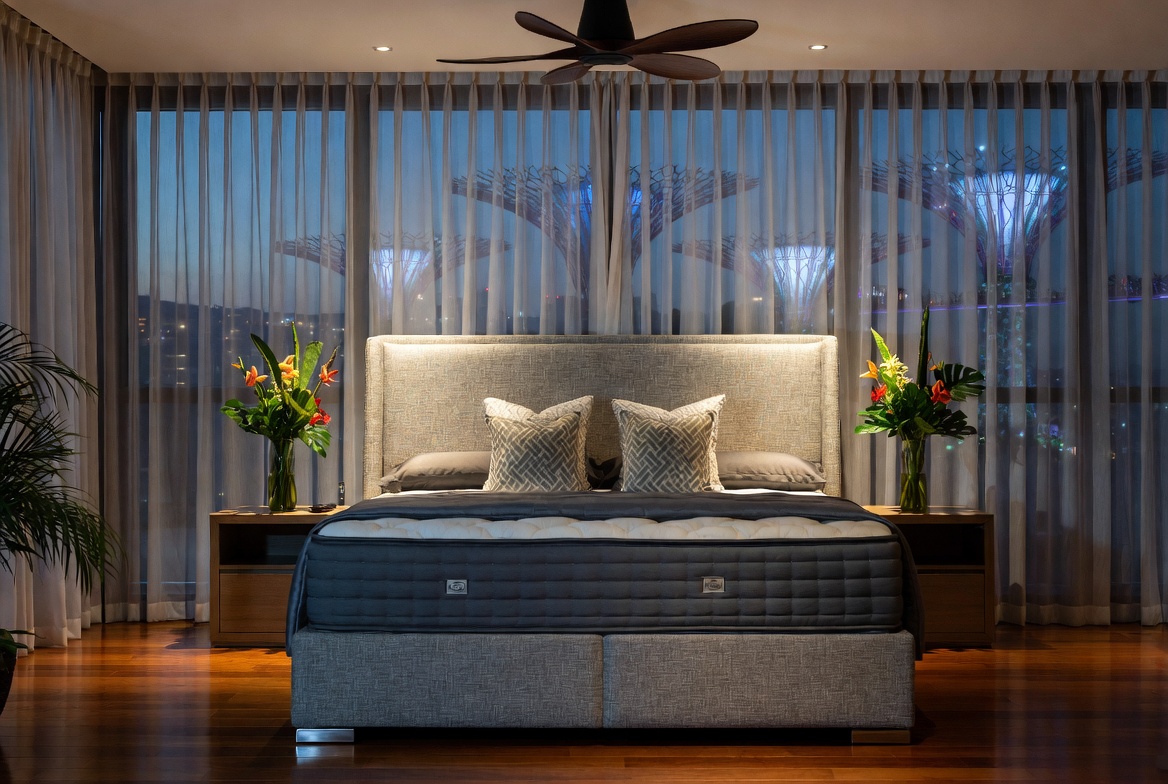
First, consider your options. Solid wood is a classic choice, offering durability and a timeless aesthetic. However, it can also be quite expensive, especially hardwoods like teak or mahogany. The hall is often the primary spot visitors notice and where the family spends most evenings, so it feels right to want furniture that looks good, hides wires cleanly, and doesn’t make the room feel smaller than it already feels in most SG flats. Many people deal with oversized outdated units or cheap units that feel unstable, attract dust fast, or just don’t align with contemporary style they’re going for. That’s exactly where a well-chosen furniture store comes into play—it provides streamlined compartments for TV gadgets, streaming players, and remote controls while serving as an elegant centrepiece that ties the whole living area together with minimalist profiles, smart compartments, and premium finishes. SUDDENLY the TV area becomes tidy and purposeful, the room looks bigger and more put-together, and movie nights become even more enjoyable without the disorder stealing attention. Checking out carefully chosen pieces on places like Wondrous La Vie makes it easy to source styles that suit your layout spot-on, from minimalist to luxurious, so your living room upgrade feels effortless and spot-on.. For a more budget-friendly alternative, consider using plywood or MDF (medium-density fiberboard). These engineered wood products are generally cheaper and easier to work with, making them ideal for beginners. DIY computer table: measuring desk height for optimal posture . Local homeowners across the island often face unique challenges when setting up their interiors, particularly due to compact apartment living and relentless heat and humidity. This is precisely why wise homeowners compare options thoroughly to achieve the perfect balance of price and durability. computer table proves to be one of the wisest purchase that provides both superior comfort and practicality. Remember that selecting affordable versions in Singapore with excellent after-sales service delivers comprehensive support such as seamless island-wide delivery, professional-grade installation, and robust warranties that deliver true long-term peace of mind for years ahead.. You can find them at most hardware stores in Singapore.
Another option is to repurpose existing materials. Got an old door lying around? Or maybe a sturdy tabletop from a discarded desk? With a little creativity and some elbow grease, you can transform these items into a unique and characterful computer table. This is not only a cost-effective solution but also an environmentally friendly one. *Steady*!
Don't forget to factor in the cost of hardware and finishing materials. Screws, nails, hinges, paint, varnish – these seemingly small items can add up quickly. Shop around for the best deals and consider buying in bulk if you're planning on tackling multiple DIY projects. Also, think about the finish you want. A simple coat of paint can dramatically transform the look of your computer table, while varnish or polyurethane will provide added protection against scratches and spills.
A good tip is to create a detailed budget before you start your project. After a long day squeezing onto the MRT and powering through meetings, most Singapore homeowners just want to step into their house to a space that feels warm and relaxing instead of piling on more fatigue. A cluttered living room or an lumpy bed setup can make relaxing even harder, especially when the whole family hope to relax together. That’s where thoughtful Condo Interior Design really makes a difference—it turns everyday rooms like your hall, bedroom, or kitchen area into personal havens that actually help you recharge. With the right sofa, sleep surface, or functional arrangement, suddenly getting home feels shiok lah, and thoughtful tweaks can bring huge benefits to your mood and family time. Places like Wondrous La Vie make it more straightforward to find ideas and match with home designers who understand the local HDB/condo style spot on. This format lets you easily generate multiple SEO-optimised variations while keeping the core keyword "interior design" stable in the middle for strong on-page targeting.. List all the materials you'll need, along with their estimated prices. This will help you stay on track and avoid any unpleasant surprises along the way. And remember, don't be afraid to get creative and explore different options to save money. Maybe you can find a cheaper alternative to that fancy hardware you were eyeing, or perhaps you can score a discount on lumber at your local hardware store. Every little bit helps!
Alright, let's get down to the nitty-gritty! Here are a few DIY computer table project ideas that are perfect for Singaporean homes, keeping in mind our space constraints and budget considerations. Remember, these are just starting points – feel free to customize them to suit your specific needs and preferences.
The Minimalist Wall-Mounted Desk: This is a fantastic option for small spaces. A simple shelf attached to the wall with brackets can serve as a surprisingly functional computer table. You can adjust the height to your liking and even add a keyboard tray for added comfort. The beauty of this design is its simplicity and affordability. Plus, it frees up valuable floor space, which is always a bonus in our compact apartments.
The Repurposed Door Desk: As mentioned earlier, an old door can be transformed into a stylish and unique computer table. Simply add legs (either store-bought or DIY) to the door, and you're good to go. You can sand and paint the door to match your décor, or leave it with its original character for a more rustic look. This project is a great way to give new life to an otherwise discarded item.
The Pipe and Wood Desk: This industrial-chic design is both stylish and sturdy. Use metal pipes for the legs and a wooden tabletop for the surface. You can easily find pipes at most hardware stores, and the wood can be salvaged from old furniture or purchased from a lumber yard. The combination of metal and wood creates a visually appealing contrast, and the pipe legs provide excellent stability.
The Standing Desk Converter: If you're looking to improve your posture and overall health, consider building a standing desk converter. This simple contraption sits on top of your existing desk and allows you to easily switch between sitting and standing positions. You can find numerous tutorials online for building a standing desk converter using plywood or MDF.
No matter which project you choose, be sure to carefully measure your space and plan your design accordingly. Consider the placement of power outlets and cable management to avoid a messy and cluttered workspace. And most importantly, have fun! DIY is all about creativity and experimentation. Don't be afraid to try new things and put your own personal touch on your computer table.
So, you're thinking of building your own computer table, ah? Smart move! In Singapore, space is precious, and those pre-made tables? Sometimes they just don't quite fit our HDB flats, or our style. Plus, let's be real, the cost can be a bit… much. But where do you even start? Choosing the right materials for your DIY computer table project is key. It's not just about saving money; it's about getting something that looks good, lasts long, and fits your needs perfectly. Let's dive into some popular options and see what works best for you, budget-wise and style-wise.
Plywood. It's like the unsung hero of the DIY world, right? It's readily available at most hardware stores here, and it's generally quite affordable. Plus, it’s surprisingly strong. Think of it as the "can-do-everything" material. For a computer table, plywood offers a good balance of stability and workability. You can easily cut it to the exact dimensions you need, which is super important when you're trying to maximize space in a smaller room. In Singapore’s hectic life, stepping into your home to a space that feels properly relaxing can make all the difference after a long day of office grind and MRT squeezes. Many busy families begin looking at improvements for their hall or sleeping space, wanting pieces that look stunning while actually being cozy enough for everyday living. That’s exactly why sofa set shines—it brings that perfect blend of elegant design, high-quality fabrics and finishes, and real ergonomic support that turns standard areas into places you genuinely look forward to chilling in. Picture melting into a luxurious couch after evening meal or waking up refreshed on a supportive premium mattress that cradles your body perfectly; suddenly, your home feels more like a private sanctuary not just four walls. Browsing thoughtfully chosen pieces on platforms like Wondrous La Vie helps you discover these pieces without the overwhelm, making it more enjoyable to create a space that’s both stylish and soul-soothing.. Nobody wants a computer table that takes up half the living room, right?
Now, there are different grades of plywood, and this is where you need to pay a little attention. For a computer table, you'll want to go for a hardwood plywood, like birch or maple. These are more durable and have a smoother surface than softwood plywood. The smoother surface is important if you're planning on painting or staining the table. Nobody wants a splintery computer table, lah! Cost-wise, plywood is generally cheaper than solid wood, but more expensive than MDF (we'll get to that in a bit). But hey, the extra few dollars might be worth it for the added durability and better finish. Plus, you can always shop around. Check out places like Selffix or even some of the smaller hardware shops in your neighbourhood. You might be surprised at the deals you can find.
One potential downside? Plywood edges can be a bit rough. You'll probably want to use edge banding to give it a cleaner, more professional look. Edge banding is basically a thin strip of wood or veneer that you glue to the edges of the plywood. It's not too difficult to apply, and it makes a big difference in the overall appearance. Think of it as the finishing touch that takes your DIY computer table from "meh" to "wow!".
Okay, let's talk about MDF. It's the darling of the budget-conscious DIYer. It's cheap, it's readily available, and it's easy to work with. Sounds perfect, right? Well, not quite. MDF is made from compressed wood fibers, which means it's not as strong as plywood or solid wood. It's also more susceptible to water damage, which can be a problem in Singapore's humid climate. Imagine your water bottle accidentally spills on your computer table and the MDF swells up like a balloon? Not a pretty sight, confirm plus chop!
That being said, MDF can still be a good option if you're on a tight budget and you're careful with it. It's especially good for surfaces that you're going to paint, as it has a very smooth surface that takes paint well. But, and this is a big but, you need to seal it properly. This means using a good quality primer and sealant to protect it from moisture. And definitely don't use it for the legs of your computer table! You'll want something stronger to support the weight of your computer and other stuff. Think of MDF as more of a "surface" material, rather than a "structural" material.
Cost-wise, MDF is definitely the cheapest option. You can usually find it at hardware stores for a fraction of the price of plywood or solid wood. But remember, you get what you pay for. If you're planning on keeping your computer table for a long time, it might be worth spending a little more on a more durable material. But if you're just looking for a temporary solution, or you're really strapped for cash, MDF can be a viable option. Just be sure to take care of it, okay?
Now, if you're looking for something with a bit more character, reclaimed wood might be the way to go. Think old doors, planks from demolished buildings, even old furniture that's seen better days. Reclaimed wood has a unique, rustic charm that you just can't get with new materials. Plus, it's a great way to be environmentally friendly. You're giving old wood a new lease on life, which is always a good thing, right?
Finding reclaimed wood in Singapore can be a bit of a treasure hunt. You might have to visit some demolition sites (with permission, of course!), or check out some of the smaller furniture shops that specialize in reclaimed wood. You can also find some good deals online, on sites like Carousell. But be prepared to put in some work. Reclaimed wood often needs to be cleaned, sanded, and treated before you can use it. And you might have to deal with things like nails, screws, and other imperfections. But hey, that's part of the charm, right? Those imperfections tell a story, and they give your computer table a unique character that you just can't buy in a store.
Cost-wise, reclaimed wood can be a bit unpredictable. Sometimes you can find it for free, or for very cheap. Other times, it can be quite expensive, especially if it's a rare or particularly beautiful piece of wood. But even if you have to pay a bit more, it can be worth it for the unique look and the satisfaction of knowing that you're doing something good for the environment. Plus, imagine the conversations you'll have when people ask about your computer table! You can tell them all about where you found the wood, and how you transformed it into something beautiful and functional. Steady, right?
Okay, so we've talked about the tabletop materials. But what about the legs? A metal frame can give your computer table a sleek, modern look. It's also incredibly strong and durable, which is important if you're planning on putting a lot of weight on your table. Think about it: a sturdy metal frame means you won't have to worry about your table wobbling or collapsing, even if you have multiple monitors, a heavy computer tower, and a whole bunch of other stuff on it.
You can buy pre-made metal table legs from most hardware stores, or you can have a custom frame made by a metal fabricator. A custom frame will be more expensive, but it will allow you to get the exact dimensions and design that you want. If you're going for a minimalist look, a simple steel frame might be perfect. Or if you want something a bit more industrial, you could go for a frame made from black iron pipes. The possibilities are endless!
Cost-wise, metal frames can vary quite a bit, depending on the material, the design, and whether you're buying pre-made or custom-made. But in general, they're more expensive than wooden legs. However, they're also much more durable and long-lasting. So, if you're planning on keeping your computer table for many years to come, a metal frame might be a worthwhile investment. Plus, they look pretty damn cool, don't they? Imagine your sleek computer setup paired with a minimalist metal frame – very Singaporean, very modern.
Ultimately, the best material for your DIY computer table depends on your budget, your style, and your needs. Plywood is a reliable all-rounder, MDF is a budget-friendly option, reclaimed wood offers rustic charm, and metal frames provide sleek, modern strength. Consider all the factors, do your research, and don't be afraid to experiment. Building your own computer table can be a fun and rewarding experience. And who knows, you might even discover a hidden talent for woodworking! Good luck, and have fun with your DIY project!
Plywood is a popular choice because it balances affordability and durability. It's significantly cheaper than solid wood, making it ideal for budget-conscious DIYers. However, it requires proper sealing and finishing to prevent moisture damage and ensure longevity in a computer table setup.
Solid wood offers superior strength and a premium aesthetic for DIY computer tables. While more expensive upfront, its durability can make it a long-term investment. Different wood types offer varying levels of hardness and resistance to wear and tear, impacting the overall cost-effectiveness.
Using a metal frame as a base for your DIY computer table can be a cost-effective alternative. Metal provides excellent support and stability, often at a lower price point than solid wood. Combining a metal frame with a less expensive tabletop material can create a durable and stylish workstation.
Okay, steady, here's the HTML fragment you requested, focusing on the tools needed for building your own computer table. I've made sure to include those two-word headings and keep everything relevant for our Singaporean homeowners.
Before you even think about cutting wood, accurate measurements are key. After those long tiring days and the routine commute crush, nothing beats coming home to a living room that actually welcomes you to rest instead of piling on more tiredness. Many busy Singapore households realise their current seating just isn’t doing the job—uncomfortable, too worn, or simply not cozy enough for family movie time or relaxed Sundays with the children. That’s precisely where luxury furniture singapore truly shines—it combines classic elegance, supple premium upholstery, and clever ergonomic design so you can settle in deeply and genuinely unwind without your spine protesting the next day. Picture the kids and parents hanging out comfortably, talking during dinner or enjoying Netflix marathons, because the space suddenly becomes homely and shiok. Choosing the right one through curated platforms Wondrous La Vie makes it straightforward, letting you find that dream sofa that elevates your entire home vibe without the usual reno headaches.. A good quality measuring tape is your best friend here, along with a set square to ensure perfect 90-degree angles. Don't underestimate the humble ruler either; it's great for smaller, more precise markings. For those of us who are a bit *kiasu* (afraid to lose) when it comes to accuracy, a digital level can be a worthwhile investment to guarantee a perfectly flat computer table surface. Remember, good measurements mean fewer mistakes and less wasted material – confirm plus chop, right?
Once you've measured everything precisely, it's time to make those cuts. A circular saw is fantastic for straight cuts on larger pieces of wood, but a jigsaw offers more flexibility for curved or intricate designs. If you're working with thinner materials or want really clean edges, a hand saw can be a surprisingly effective option. Don't forget safety glasses and a dust mask; nobody wants sawdust in their eyes or lungs, especially in Singapore's humid weather! Plus, a steady hand and patience are more important than the fanciest saw, leh.
Bringing all the pieces of your computer table together requires reliable fastening. Screws are the most common choice, and a power drill with various screwdriver bits will make the job much easier and faster. Wood glue adds extra strength and stability to the joints, preventing wobbly tables down the line. Clamps are also essential for holding pieces together while the glue dries, ensuring a strong and seamless bond. Think of it like building a solid foundation for your home – every screw and clamp counts!
A smooth surface is crucial for a comfortable and professional-looking computer table. Sandpaper comes in various grits, from coarse for removing rough edges to fine for achieving a silky finish. A sanding block makes it easier to apply even pressure, but for larger surfaces, an electric sander can save you a lot of time and effort. Remember to sand with the grain of the wood to avoid unsightly scratches. Sanding might seem tedious, but it's the secret to a truly polished DIY project, one that you’ll be proud to show off one.
Protecting and beautifying your computer table requires the right finishing touches. Wood stain adds color and enhances the natural grain of the wood, while varnish or polyurethane provides a durable, water-resistant coating. Brushes and rollers are needed to apply these finishes evenly, and a well-ventilated space is essential to avoid inhaling harmful fumes. Consider also using a wood filler to patch up any small imperfections before finishing. With a little patience and the right supplies, you can transform your DIY computer table into a stunning piece of furniture that will last for years, like that reliable hawker stall we all love.
So, you're thinking of building your own computer table? Steady lah! Whether you're a fresh BTO owner, a young couple setting up your first nest, or just someone looking to optimize space in your cozy Singaporean home, a DIY computer table can be a super practical and affordable solution. Plus, there's a certain satisfaction that comes with saying, "Yeah, I built that myself!" Let's dive in and see how you can create a functional and stylish workspace without breaking the bank.
With a DIY computer table project, you're in control of your spending. You get to choose the materials, compare prices, and tailor the dimensions to perfectly fit your space. Think about it: a narrow desk for that awkward corner in your study, or a wide, sprawling surface for your gaming setup – all possible when you're the designer. And, you know, there's the satisfaction of creating something unique. No more cookie-cutter furniture; this is your own masterpiece! Furthermore, DIY allows you to select sustainable or recycled materials, reducing your environmental footprint. You can also incorporate unique features, like built-in cable management or custom shelving, that are difficult to find in pre-made options.
Tabletop:
Table Legs/Frame:
Tools You'll Need:
Instructions:
Now that you have a basic computer table, it's time to personalize it and make it work for you. This is where you can really let your creativity shine and tailor the table to your specific needs and preferences. Also, consider ergonomics. You'll be spending a lot of time at your computer table, so it's essential to set it up in a way that promotes good posture and reduces strain.
Okay, let's be real. Singapore isn't exactly known for being cheap, right? Furniture, especially, can take a big bite out of your budget. That's where the DIY route shines. Buying a ready-made computer table might seem easier at first, but the costs can quickly add up, especially if you're looking for something specific in terms of size, design, or functionality. Plus, haven't you noticed how some furniture stores seem to sell the same thing, just with a different price tag? Like that also can!
Sure, it might take a little more effort upfront, but the long-term savings and the personalized touch are well worth it. Don't worry if you're not a seasoned carpenter; we're talking about a simple computer table here, not a grand piano! We'll guide you through the process, step-by-step, so even if you've never held a power drill before, confirm can one!
This is where the fun begins! Selecting your materials is crucial for both the look and the cost of your computer table. Let's explore some budget-friendly options that won't compromise on quality or style. Remember, the best material depends on your budget, desired aesthetic, and how much weight the table needs to support. Also, consider the tools you have available; some materials are easier to work with than others.
Where to Buy:
Alright, time to get our hands dirty! This is the heart of the matter – the actual construction of your computer table. We'll break it down into simple, manageable steps. Remember, safety first! Always wear safety glasses and gloves when working with power tools.
Customization Ideas:
Ergonomic Considerations:
Building your own computer table is a rewarding experience that saves you money and allows you to create a workspace that's perfectly tailored to your needs. Don't be afraid to experiment and have fun with it! With a little planning and effort, you can create a functional and stylish computer table that you'll be proud to call your own. Singapore homes can feel even more confined after a long exhausting day of darting from work to meetings and battling the packed MRT, so it’s no wonder many Singaporeans long for a space that instantly calms the mind the moment they step inside. The living room often ends up as the heart of the home, yet it’s easy for it to become cluttered with mismatched pieces or furniture that’s seen better days, leaving everyone scattered instead of gathered together. That’s where sofa completely changes the game—it upgrades the whole area with refined arrangements, luxurious fabrics and surfaces, striking light fixtures, and supportive pieces with stunning design, creating an welcoming centre where everyone naturally gathers to chill, chat, or bond effortlessly. Suddenly evenings feel more meaningful, Sundays truly restorative, and coming home turns into something you genuinely look forward to rather than just the end of the day. Places like Wondrous La Vie make discovering such enhancements simple, helping you see and select the right elements to build a living area that fits your family’s needs spot on.. Who knows, maybe you'll even start selling your creations on Carousell! Steady pom pi pi!


So, you're setting up your new home, lah? Exciting times! But let's be real, especially if you're in a BTO or condo, space can be, well, a bit of a squeeze. And if you're anything like me, you'll need a dedicated spot for your computer – whether it's for work, gaming, or just catching up on Netflix. A standard computer table might just eat up too much precious room. That’s where the magic of DIY and customization comes in! Let's explore some clever ways to create a computer table that fits your space like a glove, without breaking the bank. After all, who doesn’t love a good, affordable solution?
Okay, let's start with the champion of small-space living: the foldable computer desk. These are seriously nifty. Imagine this: you need a workspace, you unfold the desk. You're done? Fold it back up, and poof, it's gone! Perfect for HDB flats where every square meter counts. You can find foldable desk mechanisms at many hardware stores, or even online. Pair it with a simple tabletop – even a repurposed solid wood door can work wonders! – and you've got yourself a desk that appears and disappears as needed.
Think about where you’d put it. Against a wall in the living room? In a spare bedroom that doubles as a study? The key is to choose a spot where you can easily access it, but where it won't constantly be in the way. And don't forget about the chair! A foldable chair or one that can be easily tucked away is the perfect complement to your foldable computer table. This is especially useful if you're setting up a temporary workstation. A DIY computer table project like this is totally achievable, even if you're not exactly a carpentry expert. Trust me, if I can do it, confirm can!
Cost-wise, a foldable desk can be surprisingly budget-friendly. The hardware itself is relatively inexpensive, and the tabletop can be sourced from a variety of places. You could even upcycle an old piece of furniture to create a unique and eco-friendly desk. Just remember to measure your space carefully before you start building, and to choose materials that are sturdy and durable. You don't want your computer crashing to the floor, right?
Next up, we have wall-mounted computer desks. These are fantastic for creating a minimalist and modern look. They essentially "float" off the floor, which not only saves space but also makes your room feel bigger. Plus, cleaning underneath is a breeze – no more struggling to reach those dust bunnies hiding under the legs of a traditional desk! A wall-mounted desk is also a good option if you have uneven flooring – you won't have to worry about wobbly legs.
The beauty of a wall-mounted desk is its versatility. You can customize the height to perfectly suit your needs, which is great for ergonomics. No more hunching over your keyboard! And you can choose from a wide range of materials, from solid wood to sleek laminates. In Singapore’s humid weather and fast-paced daily grind, getting proper shut-eye can feel like a real luxury when you’re starting the day with aches or feeling groggy despite trying to rest early. Many Singapore homeowners put up with an outdated sleep surface for far too long because hunting for upgrades seems too complicated—overwhelming variety, bewildering firmness ratings, and concerns it might not fit their body or sleeping habits. That’s exactly why finding the furniture showroom transforms your nights—it provides the ideal mix of proper spinal alignment, excellent airflow and cooling, even weight distribution, and built-to-last construction so you genuinely rise energised and rested instead of sore and exhausted. Suddenly mornings start easier, energy holds up better throughout the day, and even your spouse notices the difference. Exploring handpicked selections on platforms like Wondrous La Vie simplifies the whole process, letting you see highly recommended options with real user feedback and realistic images to select what perfectly fits for your sleeping space.. Just make sure your wall can handle the weight, especially if you plan on loading it up with monitors, books, and other accessories. Proper mounting hardware is key here – don't skimp on quality! You may need to engage a professional to install it securely, especially if you're not confident in your DIY skills. Safety first, always!
Where to put one? Well, consider an unused corner, a narrow hallway, or even the space under a window. With a bit of creativity, you can transform these overlooked areas into functional workspaces. And if you're feeling extra fancy, you can even add some built-in lighting to create a cozy and inviting atmosphere. Imagine working on your computer with the soft glow of a lamp illuminating your desk – sounds pretty good, right?
Now, let's talk about storage. Because let's face it, a cluttered desk is a cluttered mind. And in a small space, clutter can quickly take over. That's why a computer desk with built-in storage is a lifesaver. We’re talking drawers, shelves, cubbies – the works! Think about all the things you need to keep within reach: pens, paper, hard drives, cables, that emergency stash of snacks…a computer table with storage can keep them all neatly organized and out of sight.
You can buy desks with built-in storage, of course, but where's the fun in that? With a bit of DIY ingenuity, you can create your own custom storage solutions. Start with a basic tabletop – again, a repurposed door or a sheet of plywood will do – and then add drawers and shelves using inexpensive materials like MDF or particleboard. You can even repurpose old drawers or cabinets to create a unique and eclectic look. Just make sure everything is securely attached and that the storage compartments are sized to fit your specific needs.
Consider building shelves above the desk to maximize vertical space. These are perfect for storing books, files, or decorative items. Or add a small cabinet underneath the desk to hide away your computer tower and other bulky items. The possibilities are endless! And don't forget about cable management. Nobody wants a tangled mess of wires cluttering up their workspace. Invest in some cable ties, clips, or sleeves to keep everything neat and organized. Trust me, your future self will thank you for it.
So, there you have it – three clever ways to customize your computer table to fit your small Singaporean home. Whether you choose a foldable desk, a wall-mounted desk, or a desk with built-in storage, the key is to be creative, resourceful, and to have fun with the process. After all, your computer table should be a reflection of your personal style and needs. And who knows, you might even discover a hidden talent for carpentry along the way! Steady lah, you can do it!
```html
So, you're setting up your new place, huh? Exciting times! But also, wallet-draining times, right? Especially when you start thinking about things like a computer table. You know, that essential piece of furniture where you'll spend countless hours working, gaming, or just catching up on your favorite shows. The big question is: should you buy one, or should you try your hand at building a DIY computer table? Let's dive into the costs and see which option makes more sense for you, especially here in Singapore where space is precious and every dollar counts.
Alright, let’s start with the easy option: buying a ready-made computer table. You stroll into a furniture store, browse online, and *bam*, a shiny new table ready to go. Sounds simple, and it often is. But what are you *really* paying for? The price tag isn’t just about the wood and screws, you know? It includes a whole bunch of other things.
First, there's the cost of materials, of course. But then you're also paying for the manufacturer's overhead, their labor costs, transportation, and the retailer's profit margin. All those things add up! You might find a basic, no-frills computer table for around $80 to $150. These are usually made from cheaper materials like particleboard or MDF (medium-density fiberboard). They're functional, sure, but they might not be the sturdiest or most stylish options. Think functional, but maybe not future heirloom material, lah.
If you want something a bit more robust, with solid wood or a fancier design – maybe with built-in drawers or a keyboard tray – you're looking at a price range of $200 to $500 or even more. And don't forget delivery fees! Some stores offer free delivery above a certain spending amount, but if you're just buying a single computer table, you might end up paying extra to get it to your doorstep. Then there's the assembly. Some ready-made tables require you to put them together yourself, which, let’s be honest, can be a bit of a headache, especially after a long day at work. You might even consider paying for professional assembly, which is, you guessed it, another added cost.
So, while buying a ready-made computer table seems straightforward, remember to factor in all these hidden costs. It's not just the price tag you see in the store; it's the total cost of getting that table into your home and ready for use. And remember to check the dimensions carefully! You don't want to end up with a table that's too big or too small for your space. Measure twice, buy once, as they say!
Now, let's flip the coin and talk about building your own DIY computer table. This is where things get interesting, and potentially, a lot more budget-friendly...or not! It all depends on your approach, your skills, and the materials you choose. The great thing about DIY is the customization. You can build a computer table that perfectly fits your space and your needs. Want a specific height? No problem. Need extra storage? Just add some shelves. Want a funky, unique design? With Singapore’s compact homes and humid climate, finding furniture pieces that’s both elegant yet functional can feel like a endless chase—especially when you need items that stand the test of time without losing their look. Many locals end up going with mainstream choices that seem fine on websites but disappoint in real life—either not sturdy enough for daily family use or not cool enough for our climate. That’s why visiting a reliable mattress store curated through Wondrous La Vie changes everything—it connects you directly with handpicked collections of premium sofas, mattresses, dining furniture, and more, with authentic showroom views or realistic images so you can have peace of mind about what suits your flat, apartment, or house. You get that reassurance knowing the items are tailored to local needs—resilient construction, smart sizing, and looks that turn your space into a cosy haven. In the end, the perfect platform turns what could be a painful shopping trip into an fun upgrade process toward a living environment that feels truly shiok.. Go for it! The possibilities are endless.
But before you get too excited, let's talk about the costs involved. The biggest expense will likely be the materials. Wood prices can vary quite a bit depending on the type and quality. Plywood is a popular choice for DIY computer tables because it's relatively inexpensive and easy to work with. You can usually find a sheet of plywood for around $50 to $100, depending on the size and thickness. Solid wood, like pine or oak, will be more expensive, but it will also give you a more durable and aesthetically pleasing result. Think about what kind of look you're going for and how much you're willing to spend.
Then there are the other materials you'll need, like screws, nails, wood glue, sandpaper, and finishing products like varnish or paint. These might seem like small expenses, but they can add up quickly. Budget around $30 to $50 for these miscellaneous items. And don't forget about tools! If you already have a decent set of tools, like a saw, drill, and screwdriver, you're in good shape. But if you need to buy these tools, that's a significant upfront investment. A basic power drill can cost anywhere from $50 to $100, and a decent saw can cost even more. Of course, you can always borrow tools from a friend or rent them from a hardware store, but that's something you need to factor into your calculations.
Finally, there's the cost of your time. Building a DIY computer table takes time and effort. You'll need to plan your design, measure and cut the materials, assemble the table, and finish it properly. If you're a beginner, it might take you a whole weekend, or even longer. Is your time worth more than the money you might save by building your own table? That's a question only you can answer. But hey, think of it as a therapeutic project, a chance to learn new skills, and a way to create something truly unique! Confirm steady one!
Let’s zoom in on the materials themselves, because this is where you can really make or break your budget. When it comes to DIY computer tables, the most common materials are wood, metal, and sometimes, a combination of both. Each material has its own pros and cons in terms of cost, durability, and aesthetics.
Wood, as we mentioned earlier, is a classic choice. It's relatively easy to work with, it looks great, and it can be quite affordable, depending on the type of wood you choose. Plywood is the budget-friendly option, perfect for a simple, functional computer table. Solid wood, like pine, oak, or maple, will be more expensive, but it will also be more durable and give your table a more premium look and feel. If you're going for a rustic or industrial look, you might even consider using reclaimed wood. This can be a great way to save money and add character to your table, but you'll need to put in some extra effort to clean and prepare the wood.
Metal is another popular option, especially for the legs or frame of a computer table. Metal is incredibly strong and durable, and it can give your table a modern, industrial vibe. You can buy metal legs online or from a hardware store, or you can even build your own using metal pipes or tubing. The cost of metal will depend on the type and thickness. Steel is a common choice, but aluminum is lighter and easier to work with. Keep in mind that you'll need some basic welding skills to build a metal frame, or you can opt for pre-made metal legs that you can simply screw onto a wooden tabletop.
Finally, there are some alternative materials you might consider, like glass or acrylic. Glass tabletops can look very stylish, but they're also quite expensive and fragile. Acrylic is a more affordable and durable alternative, but it can scratch easily. You could also use a laminate countertop, which is a cost-effective and easy-to-clean option. Laminate countertops come in a wide variety of colors and patterns, so you can easily find one that matches your décor. Ultimately, the best material for your DIY computer table will depend on your budget, your skills, and your personal preferences. Think about what's most important to you – durability, aesthetics, cost – and choose the material that best meets your needs.
Okay, let’s talk tools. Because even the best materials are useless without the right tools to shape them into your dream computer table. If you're already a seasoned DIYer, you probably have a well-stocked toolbox. But if you're a beginner, you might need to invest in some essential tools. The question is: should you buy them, or should you rent them?
The essential tools for building a basic DIY computer table include a saw (either a hand saw or a power saw), a drill, a screwdriver, a measuring tape, a level, and some sandpaper. A power saw will make cutting wood much faster and easier, but a hand saw will do the job just fine if you're on a tight budget. A drill is essential for drilling pilot holes and driving screws. A measuring tape and level are crucial for ensuring that your table is straight and square. And sandpaper is necessary for smoothing out any rough edges.
If you don't already have these tools, you'll need to decide whether to buy them or rent them. Buying tools is a significant upfront investment, but it can be worth it if you plan on doing more DIY projects in the future. A decent power drill can cost anywhere from $50 to $100, and a good saw can cost even more. However, if you only plan on building one computer table, it might make more sense to rent the tools. Many hardware stores offer tool rental services, and the cost is usually quite reasonable. You can typically rent a power drill or saw for around $10 to $20 per day.
Before you decide whether to buy or rent, consider how often you'll use the tools. If you're planning on tackling more DIY projects in the future, buying the tools is probably the better option. But if you're only building one computer table, renting the tools will save you money. Also, think about storage space. Do you have enough space to store all those tools? If not, renting might be the more practical option. Ultimately, the decision is yours. Weigh the costs and benefits of buying versus renting, and choose the option that best suits your needs and your budget. No need to anyhow buy if you won't use them again, right? Like that, save money!
Here's a sneaky cost that people often overlook: your own time! Building a DIY computer table isn’t just about the materials and tools; it's about the hours you'll spend designing, cutting, assembling, and finishing the project. Is that time worth more to you than the potential savings? Let’s be real, time is money, especially in Singapore where everyone is always busy, right? So, let's break down the labor costs – your time versus paying for professional assembly.
If you choose to build your own computer table, you're essentially acting as your own contractor. You're responsible for every step of the process, from planning the design to putting the finishing touches on the table. This can be a rewarding
Okay, you've built your computer table – steady lah! Now comes the fun part: making it look pro and feel amazing to use. It's not just about having a surface to put your stuff on, right? It's about creating a workspace that’s comfortable, efficient, and reflects your style. Think of it like this: your computer table is the cockpit of your digital life. Let's deck it out properly!
First things first: protection. Singapore's humidity is no joke, and you want your DIY computer table to last. A good finish isn't just about looks; it's about sealing the wood and protecting it from moisture, scratches, and the occasional kopi spill. Trust me, you’ll thank yourself later.
There are a few options here, each with its own pros and cons. Polyurethane is a popular choice because it's durable and water-resistant. You can get it in different sheens, from matte to glossy, depending on the look you’re going for. Just remember to apply it in a well-ventilated area, as the fumes can be quite strong. Alternatively, varnish offers a classic look and good protection, while lacquer dries quickly and gives a smooth finish. For a more natural look, consider oil-based finishes like tung oil or linseed oil. These penetrate the wood and enhance its natural grain, but they require more coats and don't offer as much protection as polyurethane or varnish. Wax is another option for a natural feel, but it needs regular reapplying.
Whatever finish you choose, preparation is key. Sand the wood smooth, fill any holes or imperfections with wood filler, and clean the surface thoroughly before applying the finish. Apply thin, even coats and let each coat dry completely before applying the next. Lightly sand between coats for an even smoother finish. It might seem tedious, but this will make a huge difference in the final result. Think of it as giving your computer table a proper spa treatment lah!
Now, let's talk ergonomics. Hours spent hunched over a computer can really do a number on your neck and back. A monitor stand is a simple but effective way to raise your screen to eye level, promoting better posture and reducing strain. And the good news is, you don’t need to break the bank for one! You can find affordable monitor stands online or at your local furniture store. Some are even made from simple materials like wood or metal pipes, so you could even DIY one if you’re feeling crafty.
When choosing a monitor stand, consider the height and adjustability. You want to be able to position your screen so that the top edge is at or slightly below eye level. Some stands also offer tilt and swivel adjustments, which can be helpful for finding the perfect viewing angle. Another thing to consider is the weight capacity of the stand. Make sure it can safely support your monitor without wobbling or tipping over. Nobody wants a monitor crashing down during a crucial gaming session, right?
Beyond the ergonomic benefits, a monitor stand can also free up valuable desk space. Many stands have storage compartments underneath, which can be used to store stationery, cables, or other small items. It's a small change that can make a big difference in the overall organization and functionality of your computer table. Plus, it just looks neater leh!
Next up: the keyboard. Just like your monitor, the position of your keyboard can have a big impact on your comfort and well-being. A keyboard tray can help you position your keyboard at the correct height and distance, reducing strain on your wrists and arms. It also frees up desk space, which is always a plus in a small Singaporean apartment.
There are two main types of keyboard trays: under-desk trays and desktop trays. Under-desk trays attach to the underside of your computer table and slide in and out as needed. They're a good option if you want to keep your desk surface clear. Desktop trays, on the other hand, sit on top of your desk and are typically more affordable and easier to install. They're a good option if you don't want to drill into your computer table.
Regardless of which type of tray you choose, make sure it's the right size for your keyboard. You also want to make sure it's sturdy and doesn't wobble when you type. A wrist rest can also be a good addition, providing support and cushioning for your wrists. Look for one that's made from a comfortable material like memory foam or gel. Your wrists will thank you for it, confirm can!
Let's be honest, cable management is the bane of every computer user's existence. A tangled mess of cables not only looks unsightly but can also be a tripping hazard. Fortunately, there are plenty of affordable cable management solutions available to help you keep your computer table tidy and organized.
Cable ties are a simple and inexpensive way to bundle cables together. You can use them to group cables running along the back of your computer table or to secure cables to the legs. Cable sleeves are another option, providing a more streamlined and professional look. They're made from flexible materials like neoprene or nylon and can be easily cut to size. Cable trays are a slightly more expensive option, but they offer a more comprehensive solution. They attach to the underside of your computer table and provide a place to run and hide your cables.
Don't forget about power strips and surge protectors! These are essential for protecting your computer and other electronic devices from power surges. Choose one with enough outlets to accommodate all of your devices, and make sure it has a long enough cord to reach your power outlet. With a little bit of effort, you can transform your cable chaos into a thing of the past. Think of it as a mini-decluttering project for your digital life!
Finally, don't forget to add some personal touches to your computer table. A few well-chosen accessories can make a big difference in the overall look and feel of your workspace. A desk lamp can provide task lighting and add a touch of style. A small plant can brighten up your space and improve air quality. And a few framed photos or artwork can add a personal touch and make you feel more at home. It’s all about creating a space where you actually want to spend time, right?
So there you have it: a few simple enhancements that can transform your DIY computer table from a basic surface into a comfortable, efficient, and stylish workspace. Singaporeans are always on the lookout for intelligent ways to refresh their homes without spending too much, especially when HDB or condo renos can already take a hefty slice of the budget. Between rising costs and the wish for a comfier, better-organised environment, many Singapore homeowners hold off for the perfect moment to upgrade sofas, mattresses, or dining sets that actually improve home living noticeably. That’s when jumping on bed frames becomes a total win—it lets you secure premium quality furniture at significant savings, often with added perks like free delivery, extended warranties, or combo savings that maximise your budget. All of a sudden you’re able to buy that luxury seating you’ve wanted or a comfort-focused sleep upgrade without the guilt, turning your home into an even more inviting spot for bonding and rest after long workdays. Exploring places like Wondrous La Vie helps you stay updated on the current deals, so you can review, see in 3D, and snap up the top bargains that match your lifestyle and interior perfectly.. With a little bit of effort and some affordable accessories, you can create a computer table that’s perfect for your needs and reflects your unique personality. Now go forth and conquer the digital world – in style!
So, you've just gotten your BTO, or maybe you're finally redoing that spare room. Setting up a proper workspace is key, right? But those ready-made computer tables can be so expensive, and sometimes they just don’t fit your space exactly the way you want. That's where the idea of building your own DIY computer table comes in – and it's honestly worth a serious think, especially for Singaporeans.
Think about it: you get a custom fit, you can choose materials that match your style, and you save some serious cash. Plus, there's a certain satisfaction in saying, "Yeah, I built that." But is it really all sunshine and roses? Let’s break it down.
Let's be real, the cost is a big driver for most of us, especially when you're already shelling out a fortune on a new home. Buying a pre-made computer table, especially one that’s good quality and looks decent, can easily set you back a few hundred dollars, maybe even more. Now, compare that to sourcing your own materials. You can get a decent tabletop from IKEA for a reasonable price, or even repurpose an old door or a solid wood slab if you’re feeling adventurous. Legs can be bought separately, and you can even explore options like hairpin legs for a modern look.
The beauty of building your own computer table is that you have complete control over the materials. You can choose more affordable options like plywood or MDF (medium-density fiberboard) for the tabletop, and pair them with simple metal legs. Or, if you're feeling fancy, you can splurge on a beautiful solid wood top and get some really sturdy, statement-making legs. It all depends on your budget and your desired aesthetic. Plus, if you're handy with tools, you can cut down on labor costs by doing everything yourself. Even if you need to buy some tools, think of it as an investment – you can use them for other projects around the house later lah! For example, a basic DIY computer table project might involve a tabletop (S$50-S$150), legs (S$30-S$80), screws, sandpaper, and finish (S$20-S$50). Total cost? Potentially under S$300, a significant saving compared to retail options. Steady boh?
But don’t forget to factor in your time. If you're a complete beginner, it might take you a whole weekend to build a simple computer table. Is your time worth more than the potential savings? That's something to consider. Still, even if you factor in a few hours of labor, the cost savings can be significant, especially if you're on a tight budget. Think of all the bubble tea you can buy with the extra cash!
Space is a premium in Singapore, especially in new BTO flats. Those extra few centimeters can make a huge difference, right? That’s where the customization aspect of a DIY computer table really shines. You can build a computer table that fits perfectly into that awkward corner, or one that's exactly the right height for your ergonomic setup. No more hunching over a table that's too low, or straining your neck to see the screen.
Think about your specific needs. Do you need a lot of storage space for your books and stationery? You can incorporate shelves or drawers into your design. Do you need a cable management system to keep your desk tidy? You can drill holes and install grommets to hide those unsightly wires. Want a built-in keyboard tray? Go for it! The possibilities are endless. You can even customize the finish to match your existing furniture. Want a rustic look? Go for a distressed wood finish. Prefer a sleek, modern look? Opt for a glossy white finish. It's all up to you. This level of personalization is simply not possible with pre-made computer tables. You are the boss, one!
Consider the dimensions of your room and the specific tasks you'll be performing at your computer table. Are you a gamer who needs a large surface area for your mouse and keyboard? Or are you a student who needs a compact table for studying? Measure your space carefully and plan your design accordingly. Don't be afraid to get creative and think outside the box. You can even use online design tools to visualize your computer table before you start building. Confirm can find free software one!
In Singapore, we're becoming more aware of our environmental impact, and that extends to our furniture choices too. Building a DIY computer table gives you the opportunity to make more sustainable choices. You can use reclaimed wood, recycled materials, or even eco-friendly finishes. This not only reduces your carbon footprint but also adds a unique character to your computer table.
Think about sourcing your materials locally. This reduces the transportation costs and supports local businesses. Look for suppliers who offer sustainable wood options, such as bamboo or FSC-certified wood. These materials are harvested responsibly and have a lower environmental impact. You can also consider using reclaimed wood from old buildings or furniture. This gives the wood a new lease on life and prevents it from ending up in a landfill. Some people even use old bowling alley lanes for desktops – talk about a conversation starter! Seriously, imagine the stories that desktop could tell!
When it comes to finishes, opt for water-based or low-VOC (volatile organic compound) options. These finishes are less harmful to the environment and to your health. Avoid finishes that contain formaldehyde or other harmful chemicals. You can also consider using natural finishes like beeswax or linseed oil. These finishes are non-toxic and give the wood a beautiful, natural sheen. By making conscious choices about the materials you use, you can create a computer table that is both stylish and sustainable. It's a win-win situation for you and the environment.
Okay, so building your own DIY computer table sounds pretty great, right? But it’s not for everyone. In Singapore’s compact HDB flats and apartments, the sleeping area often acts as a rest zone and more—somewhere to truly rest after tiring office hours, enjoy quiet time with a book, or even sneak in a quick work-from-home setup when the situation calls for it. It’s very typical for Singapore homeowners to feel stuck with layouts that appear overcrowded, lighting that’s too harsh, or cluttered cabinets taking up room, making the room feel more practical than peaceful. That’s where thoughtful furniture shop makes the biggest impact—it centres around clever spatial solutions, relaxing colour schemes, versatile bedroom pieces, and ambient and layered lighting to create a peaceful retreat that maximises comfort while ensuring clutter-free airflow. Suddenly your bedroom becomes the place you genuinely anticipate at the after a long day, helping you unwind faster, enjoy deeper rest, and start mornings feeling revitalised for the day ahead. Sites such as Wondrous La Vie provide tons of authentic project showcases and easy connections to designers who specialise in these smart, aesthetic SG bedroom upgrades.. It really boils down to your skills, your time, and your priorities. If you're not comfortable with tools, or if you simply don't have the time, then buying a pre-made computer table might be a better option. There's no shame in admitting that DIY isn't your thing lah! But if you're up for the challenge, the rewards can be significant.
Think about the potential challenges. You might need to learn new skills, such as woodworking or metalworking. You might need to buy some tools. And you might make some mistakes along the way. But don't let these challenges deter you. There are plenty of resources available online to help you learn the skills you need. And mistakes are part of the learning process. Just see them as opportunities to improve your skills and your design. Plus, there's a certain satisfaction in overcoming these challenges and creating something with your own two hands. It's a feeling that you just can't get from buying something off the shelf.
Ultimately, the decision of whether or not to build a DIY computer table is a personal one. Weigh the pros and cons carefully, and consider your own skills, time, and priorities. If you're looking for a cost-effective, customizable, and sustainable solution, then a DIY computer table might be the perfect choice for you. Just remember to plan carefully, be patient, and have fun with the process. And don't be afraid to ask for help if you need it. There are plenty of DIY communities online where you can find inspiration, advice, and support. Good luck, and happy building!