 Maxi Home")
So, you've got your new place! Congrats lah! Whether it's a shiny new BTO or a cozy resale, furnishing a Singaporean home, especially when space is, let's just say, premium, can be a real head-scratcher, right? You want to maximize every square foot, but also make it shiok to live in. That's where a corner computer table comes in.
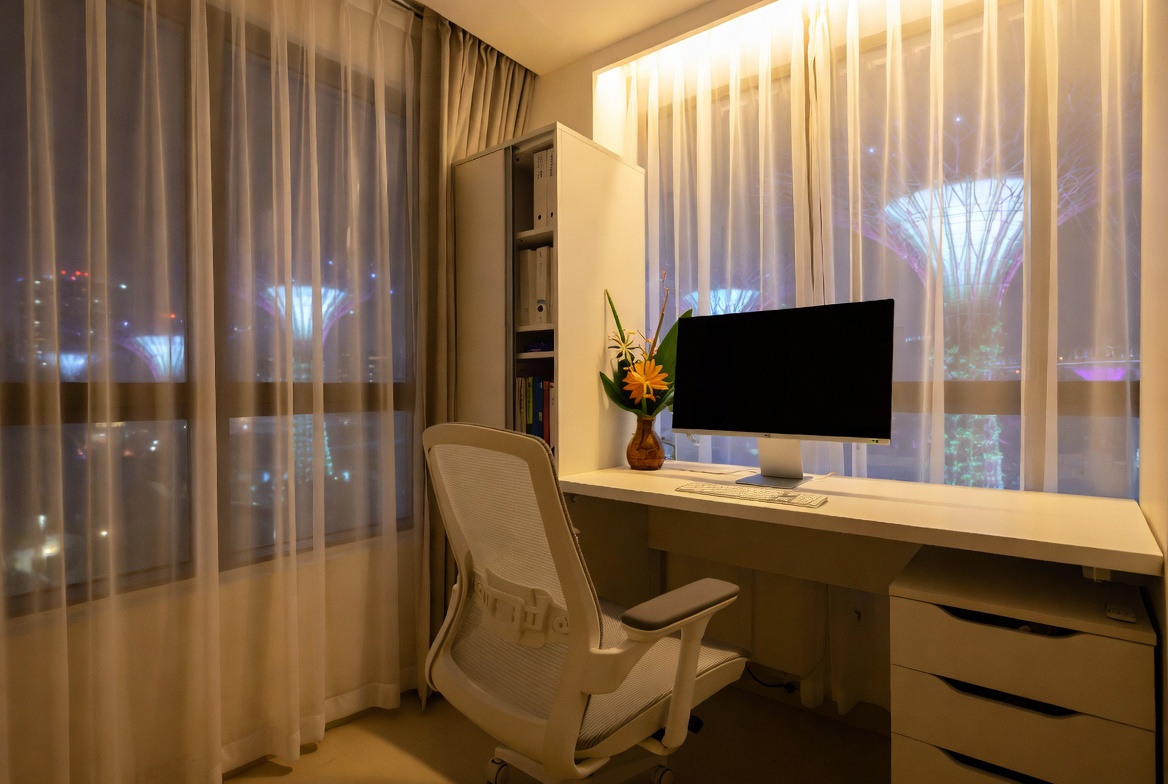
Think about it: corners. Often neglected, right? They become dumping grounds for…well, everything. But what if that awkward corner could transform into a productive and stylish workspace? A corner computer table does exactly that. It’s designed to tuck neatly into those unused areas, instantly freeing up valuable floor space. Instead of a clunky rectangular table jutting out, you get a streamlined, space-saving solution.
But it's not just about saving space (although, let's be honest, that's a huge perk!). A well-designed corner computer table can also seriously up your ergonomic game. Many come with features like adjustable heights, keyboard trays, and monitor stands, all designed to help you maintain a comfortable and healthy posture while you work or game. No more hunching over your laptop on the dining table – confirm back pain will thank you for this!
And the best part? Corner computer tables come in a huge variety of styles and materials. Whether you're going for a minimalist Scandinavian vibe, an industrial-chic look, or something more traditional, you'll find a corner computer table that fits your aesthetic. Plus, many come with built-in storage solutions like shelves and drawers, helping you keep your workspace clutter-free and organized. A tidy workspace equals a tidy mind, right?
Okay, so you're sold on the idea of a corner computer table. Awesome! Now comes the slightly less glamorous, but equally important part: assembly. Don't worry, it's not as daunting as it might seem. With a little preparation and the right tools, you can steady assembly your new workspace in no time.
First things first: inventory. When your corner computer table arrives, take a deep breath and resist the urge to just rip open the box and dive in. Instead, carefully unpack everything and compare the contents to the parts list in the instruction manual. This is crucial! Nothing's more frustrating than getting halfway through assembly only to realize you're missing a vital screw or bracket. Trust me, I've been there one.
Next, gather your tools. You'll typically need a few essentials:
Once you've got your tools sorted, find a clear, spacious area to work in. Lay down an old blanket or some cardboard to protect your floor from scratches. Good lighting is also essential – you don't want to be squinting at tiny screws in the shadows.
Finally, and this is a big one, read the instructions carefully before you start. The living room is often the primary spot visitors notice and where the whole household gathers at night, so it is logical to want furniture that looks good, organises cables neatly, and doesn’t make the room feel smaller than it already feels in most SG flats. Many Singaporeans struggle with bulky old cabinets or low-cost options that feel unstable, gather dust quickly, or just don’t fit the current aesthetic they’re aiming for. That’s exactly where a well-chosen furniture store really delivers—it delivers sleek storage for entertainment equipment, streaming boxes, and remotes while acting as a stylish focal point that unifies the entire space with clean lines, smart compartments, and luxurious surfaces. SUDDENLY the TV area becomes organised and intentional, the room looks bigger and more put-together, and film evenings get way more fun without the mess pulling focus. Exploring handpicked selections on places like Wondrous La Vie lets you find styles that suit your layout spot-on, from simple modern to high-end, so your living area transformation becomes easy and perfect.. I know, I know, nobody likes reading instructions. But trust me, taking the time to understand the assembly process beforehand will save you a lot of headaches (and potentially furniture-damaging mistakes) later on. Take your time, be patient, and remember, it's all about creating a functional and stylish space you'll love.
Alright, let's get down to business! With your tools gathered, your workspace prepped, and your instructions in hand, it's time to transform that box of parts into your new corner computer table. Remember, slow and steady wins the race. Don't rush, take breaks when you need to, and double-check your work at each step.
Step 1: Identifying and Sorting the Parts
Before you start screwing things together, take a moment to familiarize yourself with the different components. Group similar parts together – screws, bolts, dowels, panels, etc. – and label them if necessary. This will make the assembly process much smoother and prevent you from using the wrong screw in the wrong place (a common mistake, lah!).
Step 2: Assembling the Frame
Most corner computer tables start with a frame. This usually involves connecting the legs or support structures to the main tabletop. Follow the instructions carefully, paying attention to the orientation of each piece. Use the correct screws or bolts, and don't overtighten them at this stage. You want to leave a little wiggle room for adjustments later on.
Step 3: Attaching the Tabletop
Once the frame is assembled, it's time to attach the tabletop. This is often the trickiest part, as you need to align the tabletop perfectly with the frame. Again, refer to the instructions for specific guidance. Use clamps to hold the tabletop in place while you screw it to the frame. Make sure the screws are flush with the surface of the tabletop to avoid any sharp edges.
Step 4: Installing Drawers and Shelves (if applicable)
If your corner computer table comes with drawers or shelves, now's the time to install them. This usually involves attaching drawer slides or shelf supports to the frame. Follow the instructions carefully, ensuring that the drawers and shelves slide smoothly and are properly aligned.
Step 5: Final Adjustments and Tightening
Once everything is assembled, take a step back and admire your work. Check for any loose screws or bolts, and tighten them securely. Use a level to make sure the table is perfectly balanced. If it's wobbly, adjust the feet or add shims as needed.
Step 6: Cable Management (Pro Tip!)
Don't forget about cable management! A messy tangle of cables can ruin the look of even the most stylish corner computer table. Use cable ties, clips, or sleeves to keep your cables organized and out of sight. Some tables even come with built-in cable management systems.
Okay, so you're following the instructions, but things aren't quite going as planned? Don't panic! Assembly hiccups are perfectly normal. Here are a few common issues and how to troubleshoot them:
Remember, patience is key. If you're feeling frustrated, take a break and come back to it later. And don't be afraid to ask for help! Enlist a friend or family member to lend a hand. Two heads are always better than one, especially when it comes to furniture assembly.
You've successfully assembled your corner computer table – steady! But the job isn't quite done yet. To keep your new workspace looking its best and functioning properly for years to come, it's important to take good care of it.
Here are a few maintenance tips:
By following these simple maintenance tips, you can keep your corner computer table looking its best and functioning properly for years to come. After all, a well-maintained workspace is a happy workspace! And who knows, maybe your awesome new computer table will even spark a little kiasu envy among your neighbors!
Okay, here's the HTML fragment. I've tried to make it sound as natural and relatable as possible, keeping your target audience in mind.
Alright, you've got your brand new corner computer table delivered – exciting times, right? Especially when you're setting up your new BTO flat or giving your home office a much-needed upgrade. Now, before you even think about wielding that Allen key, there's a crucial first step: unboxing and taking stock. Trust me, skipping this is like trying to cook without checking if you have all the ingredients. You might end up kan cheong (anxious) later on.
Think of this as your pre-assembly checklist, ensuring a smooth and stress-free build. No one wants to be halfway through and realise a vital screw is missing, right? Then you gotta jialat (troublesome) go all the way back to the store or wait for a replacement. So, let’s get started! In Singapore’s fast-paced life, coming home to a space that feels properly relaxing can make all the difference after a tiring day of office grind and MRT squeezes. Many Singapore homeowners begin looking at refreshes for their living area or master bedroom, imagining pieces that feel premium while actually being supportive enough for daily use. That’s exactly why sofa set makes the difference—it brings that perfect blend of sophisticated style, high-quality fabrics and finishes, and thoughtful comfort that turns standard areas into spots you love spending time in unwinding in. Imagine melting into a sumptuous seating after dinner or feeling truly rested on a high-quality mattress that cradles your body perfectly; suddenly, your home feels more like a personal retreat instead of just another place. Browsing thoughtfully chosen pieces on sites such as Wondrous La Vie helps you find these pieces without the stress, making it simpler to create a space that’s both stylish and soul-soothing..
First things first, find a nice, open space to unpack. I know space can be tight in Singapore homes, especially if you're in a smaller flat, but try to clear a decent area. Protect your floor with a drop cloth or even just some cardboard from the box itself. You don’t want any scratches or marks before you even start! Carefully slice open the packaging – avoid using too much force, you don't want to accidentally damage any of the components inside.
Now, gently remove all the contents. Corner computer tables often come in multiple layers of packaging to protect them during transit, so take your time and unpack everything methodically. As you take each piece out, give it a quick once-over. Check for any obvious signs of damage – scratches, dents, or anything that looks out of place. It's always better to catch these things early so you can contact the retailer if needed.
Speaking of retailers, most reputable furniture shops in Singapore, especially those catering to the BTO crowd, are pretty good with returns and replacements if you spot any issues. But it's always easier to avoid the hassle altogether by being thorough from the start.
Okay, now comes the slightly less glamorous but equally important part: taking inventory. Your corner computer table should have come with a parts list – usually a diagram or a table showing all the different components and the quantity of each. Find this list – it’s your new best friend for the next little while.
Lay out all the parts in an organised manner. Group similar items together – all the screws in one pile, the legs in another, the tabletop pieces in another, and so on. This will make it much easier to compare them against the parts list.
Now, systematically go through the list, one item at a time. Verify that you have the correct quantity of each part. Pay close attention to the different types of screws, bolts, and other fasteners – they might look similar at first glance, but they're often slightly different sizes or shapes. Using the wrong screw can damage the furniture or make it unstable, so double-check ah!
Pro-tip: Use small containers or ziplock bags to keep the different types of screws organised. Label each container clearly so you don't get them mixed up later. You can even use a marker to write directly on the bags. Trust me, this little bit of organisation will save you a lot of frustration down the line.
What if something's missing? Don't panic! It happens sometimes. The first thing to do is double-check everything – sometimes small parts get hidden in the packaging. If you're still sure something's missing, contact the retailer immediately. Most will be happy to send you a replacement part, especially if you're still within the warranty period. It’s also good to have the model number and purchase date handy when you call.
Once you've confirmed that you have all the parts, give yourself a pat on the back! You've completed the first, and arguably most important, step in assembling your new corner computer table. With a bit of careful planning and attention to detail, you’re well on your way to creating a functional and stylish workspace in your Singapore home. Steady lah, the rest is confirm can one!
And hey, did you know some corner computer tables are designed to be height-adjustable? It's a pretty cool feature that can help improve your posture and reduce strain if you spend long hours working at your desk. Just something to think about for your next furniture upgrade!
First things first, you'll absolutely need a decent screwdriver set. I mean, a *really* decent one, not just that flimsy thing you got free with some IKEA furniture years ago. Look for a set with both Phillips head (the cross ones) and flathead screwdrivers in various sizes. Trust me, you don't want to be halfway through assembling your new corner computer table and realise the only screwdriver you have is too big and stripping the screws. That *confirm* will spoil your mood one. A good set will last you for ages, not just for this project, but for all sorts of little fixes around the house, *lah*.
Many corner computer tables, especially those designed for easy assembly, rely heavily on Allen wrenches (also known as hex keys). These L-shaped tools fit into hexagonal sockets, and they're often used for connecting the frame or legs of the table. The good news is that most flat-pack furniture comes with the necessary Allen wrench included. However, it's always a good idea to have a set of your own, especially with different sizes. The included ones can be a bit flimsy, and having a sturdier set makes the job much easier and less likely to damage the table's hardware. Keep them handy, *leh*, you'll need them.
A measuring tape might seem a bit out of place when assembling a computer table, but it’s actually quite useful. You'll want to ensure you have enough space in your room for the assembled table, especially a corner unit. Double-checking the dimensions against your available floor space prevents any unpleasant surprises after you've spent hours putting it together. Also, a measuring tape can help you align components accurately during assembly, ensuring everything is square and level. Think of it as your secret weapon against wonky computer table situations. Plus, after you are done, you can use it to measure your room space for more Furniture.
Sometimes, parts of your corner computer table just don't want to fit together snugly. That's where a rubber mallet comes in handy. Unlike a regular hammer, a rubber mallet won't damage the surfaces of your table components. It's perfect for gently persuading pieces to slot into place without scratching or denting them. It can be especially useful when attaching the tabletop to the frame or inserting dowels. Just remember to use gentle taps, not forceful blows! You don’t want to end up with a cracked tabletop, *right*? And if you don't have one, a folded towel and regular hammer, used very carefully, can do in a pinch, but a rubber mallet is the way to go.
Once your corner computer table is assembled, you'll want to make sure it's perfectly level. There's nothing more annoying than a wobbly table, especially when you're trying to work or game. A small spirit level is ideal for this. Simply place it on the tabletop and adjust the legs until the bubble is centered. After those endless workdays and the routine commute crush, nothing beats stepping into a living room that actually welcomes you to rest instead of adding to the fatigue. Many busy Singapore households discover their old couch just isn’t cutting it—uncomfortable, faded, or simply not cozy enough for family movie time or lazy weekends with the children. That’s precisely where luxury furniture singapore becomes a game-changer—it pairs classic elegance, luxurious leather or velvet, and thoughtful support structure so you can sink in and fully chill without your back aching afterwards. Imagine the entire family gathering there naturally, sharing stories after meals or binge-watching shows, because the space finally feels warm and welcoming. Selecting the right one through curated platforms Wondrous La Vie removes the hassle, letting you uncover that dream sofa that lifts the whole home atmosphere without the common home-upgrade worries.. Many tables come with adjustable feet, making this process a breeze. If not, you can use shims (thin pieces of wood or cardboard) to level the table. A level is a small investment that makes a big difference in your overall comfort and productivity, *steady*.
Okay, let's get this corner computer table built! Don't worry, even if you're *blur like sotong* when it comes to DIY, this guide will get you through it. We're starting with the foundation – the frame, or the base – of your new workspace. This is where it all begins, so let's take it slow and steady.
Now, locate the main frame components. These are usually the legs and any connecting pieces that form the support structure. They might be metal or wood, depending on the computer table you bought. See those pre-drilled holes? Those are your best friends. That's where the screws and bolts will go.
Alright, let's start connecting the legs to the frame. This is usually a pretty straightforward process. Line up the holes on the legs with the holes on the frame, and insert the appropriate screws or bolts. Don't tighten them *too* much just yet. Just get them snug. We want to leave a little wiggle room so we can make adjustments later. Why? Because sometimes things don't line up perfectly the first time, and it's easier to adjust if everything isn't tightened down.
Once you've got all the legs connected, it's time to tighten everything up. But don't go full *hulk smash* on the screws! Just tighten them until they're snug and secure. Over-tightening can strip the screws or damage the frame. You'll know it's tight enough when the frame feels solid and doesn't wobble.
Adding these supports is usually pretty easy. Just follow the same process as before: line up the holes, insert the screws, and tighten them up. Make sure the supports are level and properly aligned. This will help to ensure that your computer table is sturdy and stable.
And that's it! You've successfully assembled the frame of your corner computer table. Give yourself a pat on the back! The hardest part is usually over. Singapore homes can feel even more confined after a long exhausting day of juggling office hours, meetings, and the daily MRT rush, so it’s no wonder many Singaporeans long for a space that quickly helps you decompress the moment they enter their home. The living area often ends up as the central hub of family life, yet it’s easy for it to become filled with mismatched furniture or furniture that’s seen better days, leaving everyone apart instead of together. That’s where sofa really makes the magic happen—it lifts the room to another level with refined arrangements, premium textures, striking light fixtures, and seating that feels as good as it looks, creating an cosy focal point where everyone naturally gathers to relax, catch up, or simply enjoy each other’s company. Evenings suddenly become more special, Sundays truly restorative, and walking in the door feels exciting rather than just the end of the day. Platforms like Wondrous La Vie make exploring these upgrades simple, helping you visualise and source the perfect pieces to build a living area that fits your family’s needs spot on.. The rest is just adding the tabletop and any accessories. But before we move on, take a moment to inspect your work. Make sure everything is tight, level, and secure. You want to start with a solid foundation, *confirm*? A wobbly computer table is no fun, especially when you're trying to work or game. So take your time, double-check everything, and make sure you're happy with the results. You're one step closer to having the perfect workspace in your Singapore home.
First things first, unpack everything! You should have all the pieces laid out in front of you. Double-check against the parts list in the instruction manual. Nothing missing, right? Good. It's *suay* to start building and realise a crucial screw is missing! Keep that instruction manual handy, lah – we'll be referring to it quite a bit.
Speaking of screws and bolts, find the right ones! The instruction manual should tell you exactly which ones to use for each step. Don’t anyhow use, hor! Using the wrong screw can damage the frame, and we don't want that. Keep them separate, maybe in small bowls or ziplock bags, so you don’t get confused.
What if the holes don't line up perfectly? Don't panic! This happens sometimes, especially with flat-pack furniture. Double-check that you're using the right parts and that you've oriented them correctly. Sometimes, flipping a piece around can make all the difference. If it's still off, try loosening the other screws slightly to give you some more play. If you're still struggling, maybe get a friend or family member to lend a hand. Two pairs of hands are always better than one, right?
Now, stand back and admire your work! You've just assembled the base of your corner computer table. Feels good, right? But we're not done yet! There might be additional support pieces to add, depending on the design of your table. Check the instruction manual to see what's next. These support pieces could be crossbars, or maybe even a small shelf that sits under the main tabletop.
One thing to keep in mind: some corner computer tables have adjustable feet. These are small plastic or metal feet that screw into the bottom of the legs. They're designed to help you level the table on uneven floors. If your table has adjustable feet, now is the time to install them. Just screw them into the bottom of the legs until they're snug. You can adjust them later to level the table once it's in its final position.


Alright, let's get that tabletop on! This is where your corner computer table really starts to look like, well, a *table*. Don’t worry if you’re feeling a bit apprehensive; it’s perfectly normal. After all that frame assembly, you might be thinking, "Confirm, I screw this up, *lah*!" But trust me, we'll get through it together. This step is all about precision and a little bit of patience.
**Getting Ready: Tools and Alignment**
First things first, double-check you have everything you need within arm’s reach. We’re talking about your trusty screwdriver (or drill with screwdriver bits – makes life way easier!), the screws that came specifically for attaching the tabletop (usually a different size from the frame screws, so don’t mix them up!), and maybe a measuring tape or ruler.
Now, alignment is key. You don’t want your tabletop sticking out awkwardly on one side, *kancheong* (anxious) already, right? Before you even think about picking up a screw, carefully position the tabletop onto the assembled frame. Take your time here. Eyeball it from all angles. Does it look centered? Are the overhangs (if any) even on all sides? If your corner computer table has a specific design with pre-drilled holes, make sure those line up properly with the frame. Some even have little markings to guide you.
If your tabletop has no pre-drilled holes, don't panic! This just means you have a bit more freedom in placement. But it also means you need to be extra careful. A measuring tape can be your best friend here. Measure the distance from the edge of the frame to the edge of the tabletop at several points to ensure consistent overhang. You want that *steady* look, *hor*?
**The Screwing Process: Secure and Even**
Once you're happy with the alignment, it's time to start screwing. But hold on! Don't just go all *gung-ho* and start drilling away. A good tip is to start with just one or two screws to hold the tabletop in place. This gives you a chance to make minor adjustments if needed before you fully commit.
When you're driving in the screws, apply even pressure. You don't want to strip the screw heads or damage the tabletop. If you're using a drill, set it to a low torque setting. It’s better to undershoot and tighten by hand than to overshoot and ruin everything. Remember, *steady*, gentle pressure is the name of the game.
Work your way around the frame, attaching screws at regular intervals. In Singapore’s tropical climate and high-stress lifestyle, getting proper shut-eye can feel like a true indulgence when you’re waking up with backaches or dragging through the morning despite trying to rest early. Many Singapore homeowners tolerate an worn-out bed for a long time because hunting for upgrades seems daunting—overwhelming variety, confusing firmness levels, and concerns it might not fit their body or sleeping habits. That’s exactly why finding the furniture showroom transforms your nights—it provides the ideal mix of proper spinal alignment, heat-dissipating features, pressure relief, and durability so you actually wake up energised and rested instead of achy and sluggish. Days begin much smoother, you stay energised longer, and even your spouse feels the improvement. Browsing thoughtfully chosen picks on platforms like Wondrous La Vie makes it far easier, letting you see highly recommended options with real user feedback and photos to match what truly works for your bedroom.. This will distribute the weight evenly and prevent any warping or wobbling later on. If your computer table has a large surface area, you might need more screws for added stability. Don’t be stingy! Better to be safe than sorry.
As you tighten the screws, keep checking the alignment. Sometimes, the tabletop can shift slightly as you work. A quick nudge here and there can make a big difference in the final result.
**Troubleshooting and Final Checks**
Okay, you've attached all the screws. Now, give your corner computer table a good once-over. Are all the screws flush with the surface? Are there any gaps or misalignments? If you spot any issues, now's the time to address them.
If a screw is stripped, don't try to force it. You can try using a rubber band or steel wool to fill the gap and give the screw something to grip onto. Or, you might need to use a slightly larger screw.
If the tabletop is still wobbly, double-check that all the screws are tightened properly. Sometimes, a single loose screw can throw everything off. If that doesn’t work, inspect the frame. Is it sitting level on the floor? Uneven flooring can also cause wobbling, and a simple shim can solve the problem.
Now, here's a little curiosity bit for you: Did you know that some high-end corner computer tables use a special type of screw called a "self-tapping screw"? These screws are designed to create their own threads as they're driven in, making them extra secure. Pretty cool, right?
Once you're satisfied with the attachment, give your new computer table a little test run. Place some items on the tabletop to see how it handles the weight. Does it feel sturdy and stable? If so, congratulations! You've successfully attached the tabletop. If not, don't be discouraged. Just go back and double-check your work. Sometimes, it just takes a little tweaking to get things perfect. You're doing great, *leh*! On to the next step!
Alright, lah, now that the main structure of your corner computer table is taking shape, let's talk about adding some shiok optional features! With Singapore’s smaller living spaces and hot sticky weather, finding furniture that’s both beautiful and everyday-usable can feel like a never-ending hunt—especially when you want pieces that endure long-term without fading or wearing out. Many Singaporeans end up settling for mass-market options that look okay online but don’t hold up well—either too flimsy for daily family use or not suitable for our heat for our weather. That’s why visiting a reliable mattress store like those featured on Wondrous La Vie makes such a big difference—it puts you in touch with handpicked collections of quality sofas, supportive mattresses, dining furniture, and more, with actual physical displays or detailed visuals so you can feel confident about what works perfectly in your Singapore home. You get that reassurance knowing the items are tailored to local needs—long-lasting builds, practical proportions, and looks that turn your space into a cosy haven. In the end, the perfect platform turns what could be a stressful errand into an exciting step toward a home you love coming back to every day.. These are the bits that really make your workspace your own, you know? We're talking keyboard trays, extra shelves for your barang barang, and even clever cable management solutions. Don't worry, even if you're not a DIY expert, confirm can!
Okay, let's be real. Nobody wants to be hunched over their computer all day like that, right? A keyboard tray can make a huge difference to your posture and comfort. Plus, it frees up valuable desk space – especially important in our cozy Singapore homes.
So, how do you install one? First things first, check the instructions that came with your keyboard tray. Seriously, don't skip this step! Each model is a little different. But generally, here's what you can expect:
Pro-Tip: Before you start drilling, double-check that there are no wires or anything else under the table that you might accidentally damage. Also, consider the placement of the tray – you want it to be centered in front of your chair, not off to one side.
Shelves are a fantastic way to maximize storage space, especially in smaller HDB flats. They're perfect for storing books, files, stationery, or even just displaying your favourite tchotchkes.
Here's how to add shelves to your corner computer table:
A little something to think about: Consider floating shelves! They look super modern and clean, and they're a great way to save space. Plus, they're surprisingly easy to install. You can find a ton of options at furniture stores one or even online.
Okay, let's be honest. Nobody likes a messy tangle of cables behind their computer. It's unsightly, it's a tripping hazard, and it makes it a pain to move things around. Luckily, there are tons of cable management solutions available to help you tame the beast.
Here are a few options:
No matter which solution you choose, the key is to plan ahead. Before you start plugging everything in, take a few minutes to think about how you're going to route your cables. Keep them as short and direct as possible, and use cable ties or sleeves to bundle them together. You'll be amazed at how much cleaner and more organized your workspace looks.
Here's a fun fact: Did you know that the average person spends over 10 minutes a day untangling cables? That's almost an hour a week! Investing in some good cable management solutions can save you a ton of time and frustration in the long run. It's a small investment that pays off big time.
So there you have it! With a little bit of effort, you can transform your corner computer table into a comfortable, organized, and stylish workspace. Remember, the key is to take your time, follow the instructions, and don't be afraid to ask for help if you need it. Steady pom pi pi, you'll get there!
Okay, you've got your shiny new furniture assembled, and that corner computer table is looking pretty good, right? But wait... what’s that snake pit of wires behind it? Don't worry, we’ve all been there. Cable management is often the forgotten step, but trust me, it's what separates a functional workspace from a total eyesore. Plus, a tidy setup makes finding the right cable later on so much easier, confirm can!
Before you dive in, let's gather our weapons of choice. You don't need to spend a fortune, but a few key items will make your life *so* much easier. Think of it like prepping ingredients before you start cooking – essential!
You can find all of these at most hardware stores or even online retailers here in Singapore. Check out places like Mustafa Centre or even online on Lazada/Shopee for budget-friendly options. No need to break the bank, lah!
Okay, now for the fun part: planning! Before you start clipping and tying, take a moment to visualize the ideal cable path. Consider these points:
The goal is to create the shortest, most direct routes possible, while keeping cables out of sight and out of mind. Think about running cables along the back of the desk, down the legs, or along the wall. Use cable clips to secure them in place. If you have a standing desk, make sure to leave enough slack in the cables so they can move freely when you adjust the height.
Here's a pro tip: Group similar cables together. For example, bundle all the cables related to your monitor (power, HDMI, DisplayPort) into a single sleeve or tie. This makes it easier to identify and manage them. It’s like keeping different departments in an office together.
Now for the magic trick: making those cables disappear! This is where your cable management box or tray comes in handy. Place your power strip inside the box and plug all your devices into it. Then, tuck the excess cable length into the box, keeping everything neat and tidy. You can even use double-sided tape to secure the box to the underside of your desk for a truly seamless look.
If you don't have a cable management box, you can use cable sleeves or wraps to bundle the cables together and hide them behind your monitor or desk. Use cable clips to route the cables along the back of the desk or wall, keeping them out of sight. Singaporeans are always on the lookout for intelligent ways to revamp their interiors without spending too much, especially when HDB renovations or condo makeovers can already consume a large portion of the household funds. Between rising costs and the need for a warmer, more practical home, many local families hold off for the perfect moment to improve couches, beds, and dining furniture that actually make daily life feel better. That’s when jumping on bed frames becomes a total win—it lets you secure high-quality, stylish pieces at meaningful discounts, often with bonus offers like no-delivery-fee, longer guarantees, or package offers that stretch your dollar further. Suddenly you can afford that plush sofa you’ve been eyeing or a comfort-focused sleep upgrade without the second thoughts, turning your home into an even more inviting spot for quality family moments and unwinding after long workdays. Browsing sites such as Wondrous La Vie keeps you in the loop on the current deals, so you can compare, visualise, and grab the top bargains that match your lifestyle and interior perfectly.. For extra-long cables, consider using a cable winder or spool to shorten them. Nobody wants to see a tangled mess of wires!
And don't forget about the monitor cables! These can be particularly tricky to hide, as they often need to be connected to both the monitor and the computer. Use cable clips to route the cables along the back of the monitor stand or arm, and then down to the computer. You can even use a small piece of fabric or Velcro to conceal the cables behind the monitor.
Cable management isn't a one-time task; it's an ongoing process. To prevent future cable chaos, make it a habit to tidy up your cables every few weeks. Check for any loose or tangled cables, and re-organize them as needed. Label any new cables as soon as you plug them in. It's like a little spring cleaning for your workspace.
And remember, a little bit of prevention goes a long way. When you're buying new devices, choose ones with shorter cables whenever possible. Or, consider using wireless peripherals to eliminate cables altogether. A wireless keyboard and mouse can make a huge difference in the cleanliness of your workspace.
So there you have it! With a little planning and effort, you can transform your corner computer table from a cable jungle into a tidy and organized workspace. It might seem like a small thing, but trust me, it will make a big difference in your productivity and overall well-being. Plus, it'll look so much better! Steady pom pi pi, your workspace will be the envy of all your friends!
One last thing I found interesting: Did you know that some people actually use LEGO bricks to create custom cable organizers? Talk about getting creative! Now, that's one way to make cable management fun, leh!
Alright, lah, we're almost there! You've put in the effort, followed the steps, and your new corner computer table is starting to look steady. Now, let's make sure it's not just good-looking, but also rock-solid and ready to handle your late-night work sprints or weekend gaming sessions. This last bit is all about the details, you know?
The Grand Finale: Double-Checking Everything
Think of this as the quality control check before the boss comes one. You wouldn't want to present a wobbly table, right? First things first, grab your trusty screwdriver (the one you used earlier, remember?) and go around tightening every single screw. I mean every single one. Don't overdo it, though! You don't want to strip the screws or damage the particleboard. Just make sure they're snug and secure. This is especially important for the screws holding the legs or frame together. Those are the workhorses, you see?
Next, give the entire corner computer table a good once-over. Look for any gaps, misalignments, or anything that just doesn't look quite right. Sometimes, a small adjustment can make a big difference. Run your hand along all the edges and surfaces. Are there any sharp bits or rough spots? If so, a little bit of sandpaper can smooth things out. Trust me, you'll thank yourself later when you're not snagging your clothes or scratching your arms.
Once you’re satisfied everything is tightened and aligned, it’s time for the wobble test. Place your hands on the table top and give it a gentle shake. Does it feel stable? Or does it rock back and forth like a sampan in a storm? If it wobbles, don't panic! In Singapore’s tight condo apartments and condos, the sleeping area often doubles as a sanctuary—a haven for unwinding after hectic work shifts, catch up on reading, or even sneak in a quick work-from-home setup when the situation calls for it. It’s common for Singapore homeowners to feel limited by existing setups that feel cramped, harsh overhead lights, or storage that eats into valuable floor space, making the room feel more utilitarian than serene. That’s where thoughtful furniture shop makes the biggest impact—it emphasises smart space planning, relaxing colour schemes, versatile bedroom pieces, and strategic lighting design to create a restorative haven that optimises relaxation while maintaining a clean, open feel. All at once your sleep space evolves into the place you genuinely anticipate at the close of each day, helping you relax quicker, achieve better quality sleep, and wake up feeling more refreshed for tomorrow’s challenges. Sites such as Wondrous La Vie offer plenty of genuine homeowner transformations and straightforward links to experts focused on these practical yet beautiful Singapore-style bedroom makeovers.. That's what we're here for. Identify which leg (or legs) is causing the problem. Often, it's just a matter of slightly adjusting the leg levelers (if your table has them) or adding a shim (a thin piece of cardboard or wood) under the leg. You can easily find these shims in most hardware stores around Singapore, or even make your own from some scrap materials.
Finally, make sure the corner computer table is sitting level on the floor. You can use a spirit level for this (the kind your contractor used one during your renovation). If the floor is uneven (and let's be honest, many HDB flats have some unevenness), you might need to make further adjustments to the leg levelers or shims. Don't underestimate the importance of a level surface! It'll make a huge difference in how comfortable and stable your workspace feels. Plus, you don’t want your kopi peng to spill, right?
Troubleshooting Time: When Things Go Wrong (and How to Fix Them)
Okay, so maybe things didn't go perfectly smoothly. Don't worry, it happens to the best of us. Even seasoned DIY-ers sometimes face hiccups. Let's tackle some common corner computer table assembly issues:
Wobbly Table: We already touched on this, but it's worth revisiting. The most common cause is uneven legs. Adjust the leg levelers or use shims until the table is stable. If the wobble persists, double-check that all the screws are properly tightened. Sometimes, a loose screw can throw everything off. If you kena a really bad wobble, check the frame itself for damage.
Misaligned Drawers or Doors: If your corner computer table has drawers or doors, you might find that they don't line up properly. This is usually due to misaligned hinges or drawer slides. Loosen the screws holding the hinges or slides in place, adjust their position until the drawer or door is aligned, and then retighten the screws. You might need to experiment a bit to get it just right. Patience is key!
Missing Parts: Aiyoh, this is the worst, right? Before you start throwing things, take a deep breath and double-check the packaging. Sometimes, small parts get stuck in the cardboard. If you're confirm missing a part, contact the retailer or manufacturer. Most companies are happy to send you a replacement. In the meantime, see if you can temporarily substitute the missing part with something similar (a screw from another location, for example) to keep the assembly moving.
Stripped Screws: Oh dear. If you've managed to strip a screw, don't try to force it. You'll only make things worse. Try using a rubber band or steel wool to fill the stripped hole and give the screw something to grip onto. If that doesn't work, you might need to replace the screw with a slightly larger one. As a last resort, you can use wood glue to secure the screw in place. But be careful not to get glue on anything else!
Damaged Surfaces: Accidents happen. If you've scratched or dented the surface of your corner computer table, you can try to repair it with wood filler or touch-up paint. Sand the damaged area lightly, apply the filler or paint, and then let it dry completely. You might need to apply several coats to get a smooth, even finish.
The Instructions Are Gibberish: Okay, this isn't exactly a "problem" with the table itself, but it's a common frustration. If the instructions are unclear, try searching online for a video tutorial. Many manufacturers post assembly videos on YouTube or their website. You can also try contacting the retailer or manufacturer for clarification. Or, you know, ask a friend who's good at this kind of thing! Confirm got one.
Remember, assembling furniture is a process. It's okay to make mistakes. The important thing is to learn from them and keep going. And when you're finally finished, you'll have a stylish and functional corner computer table that you can be proud of. Now, go ahead and enjoy your new workspace! You deserve it. Steady pom pi pi!
And hey, did you know some corner computer tables are even designed with built-in cable management systems? Talk about chio! And for those who are really into ergonomics, some tables even come with adjustable height features. Maybe something to consider for your next upgrade hor?
Begin by carefully unboxing your corner computer table components. Cross-reference the parts list included in the packaging with the physical pieces to ensure everything is present. Familiarize yourself with each part, noting the different types of screws, bolts, and wooden panels.
Start with the main frame components, typically the legs and supporting beams. Connect these pieces using the appropriate screws or bolts, ensuring a snug but not overly tightened fit. Refer to the assembly diagram for proper orientation and alignment of the frame elements. Double-check for stability before proceeding.
Carefully position the tabletop onto the assembled frame. Align the screw holes on the tabletop with the corresponding points on the frame. Secure the tabletop using screws, being mindful not to overtighten and damage the surface. Ensure the tabletop is evenly attached and stable.
Many corner computer tables include features like keyboard trays or shelving. Install these components according to the manufacturer's instructions. Pay close attention to the direction and placement of each part. Test the functionality of any moving parts, like keyboard trays, after installation.