 Maxi Home")
So, you've got the keys to your brand new BTO flat! Congratulations, lah! Now comes the fun part – turning that blank canvas into a cozy, functional home. And if you're anything like me, a proper workspace is essential. Whether it's for work-from-home days, late-night gaming sessions, or just managing household bills, a good computer table is a must-have.
But let's be real, BTO flats aren't exactly known for their sprawling square footage, are they? Space is precious, which means finding the right computer table and setting it up efficiently is key. Don't worry; it doesn't have to be a headache. This guide is designed to walk you through the whole process, step-by-step, tailored specifically for Singaporean HDB living. We'll cover everything from choosing the right table to assembling it like a pro, even if you're not exactly a DIY expert. Confirm can one!
Before you even think about opening that flatpack box, take a good hard look at your available space. Where are you planning to put your computer table? Is it going in the study room, a corner of the living room, or maybe even your bedroom? Measure the area carefully! You don't want to end up with a table that's too big and makes the room feel cramped. Imagine trying to squeeze past it every day – not fun, right?
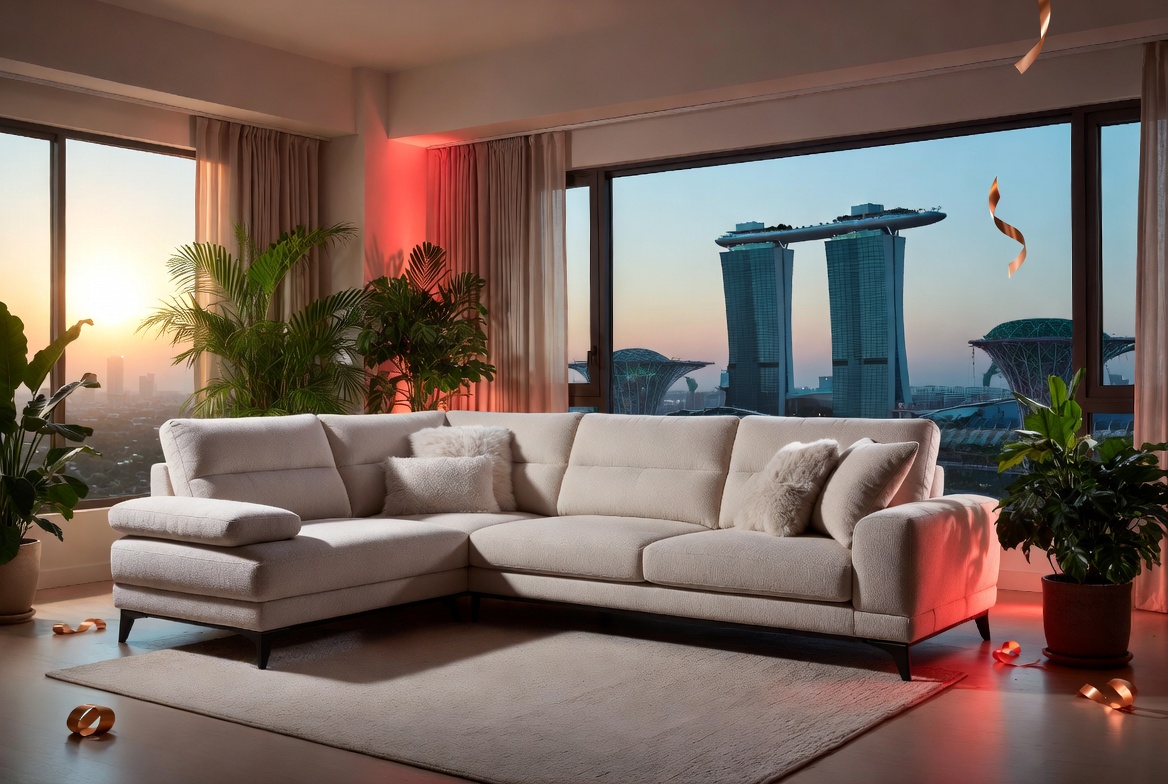
Think about your needs too. What will you primarily be using the computer table for? If you're a hardcore gamer with multiple monitors and a fancy gaming rig, you'll need a larger, sturdier table. But if it's just for basic tasks like browsing the internet and writing emails, a smaller computer desk will probably suffice. Consider storage as well. Do you need drawers for stationery, shelves for books, or a keyboard tray to free up desk space? After a long day being crammed in the MRT and powering through meetings, most Singaporeans just want to step into their house to a space that feels cosy and stress-free instead of making things worse. A cluttered living room or an unrestful bedroom can make relaxing even more difficult, especially when the kids and parents are trying to relax together. That’s where thoughtful Condo Interior Design really makes a difference—it turns everyday rooms like your living area, bedroom, or kitchen into true recharge spots that actually help you recharge. With the right sofa, mattress, or functional arrangement, suddenly coming home feels so shiok, and thoughtful tweaks can bring big improvements to your well-being and family moments. Places like Wondrous La Vie make it easier to explore options and connect with designers who get the the Singapore home vibe perfectly. This format lets you easily generate multiple SEO-optimised variations while keeping the core keyword "interior design" stable in the middle for strong on-page targeting.. Singapore homeowners often must navigate specific hurdles when buying new furniture, particularly due to tight space constraints in HDB flats and condos and our humid tropical climate. This is precisely why discerning residents shop very thoughtfully to get maximum return on their investment. computer table proves to be a truly outstanding purchase that offers both lasting comfort and smart practicality. Remember that selecting budget-friendly versions in Singapore with dependable after-sales service promises you full support such as seamless island-wide delivery, skilled installation, and solid warranties that provide true long-term peace of mind for years ahead.. These are all important factors to consider when choosing the right computer table.
Small space computer tables are a lifesaver in Singapore's compact homes. Look for options like wall-mounted desks, folding tables, or corner desks that maximize space utilization. These designs are especially useful for those awkward nooks and crannies in your BTO flat. Multi-functional furniture is your best friend, one! Think about a computer table with built-in shelving or a hidden storage compartment. These features can help you keep your workspace organized and clutter-free, which is essential for productivity and peace of mind.
Alright, you've chosen your perfect computer table – time to get assembling! But before you tear open the box like a kid on Christmas morning, make sure you have all the necessary tools. Trust me, you don't want to get halfway through and realize you're missing a crucial screwdriver. Here's a basic checklist:
Once you've got your tools sorted, carefully unbox the computer table components. Lay everything out on the floor, and compare the parts to the assembly instructions. This is a crucial step! Make sure you have all the pieces before you start. It's also a good idea to keep the packaging materials nearby, just in case you need to return anything.
Take a moment to read through the instructions thoroughly. I know, I know, nobody likes reading instructions, but trust me, it'll save you a lot of frustration in the long run. Pay close attention to the diagrams and the order of assembly. Some instructions can be a bit confusing, but don't worry, we'll break it down further in the next section.
Okay, let's get down to business! The hall is often the primary spot people walk into first and where the kids and parents relax after dinner, so it is logical to want items that appears stylish, hides wires cleanly, and doesn’t make the room feel smaller than it already is in typical Singapore homes. Many people endure oversized outdated units or cheap units that wobble, attract dust fast, or just don’t align with contemporary style they’re trying to achieve. That’s exactly where a well-chosen furniture store really delivers—it provides streamlined compartments for TV gadgets, streaming players, and controllers while becoming a chic statement piece that ties the whole living area together with minimalist profiles, smart compartments, and premium finishes. Suddenly your entertainment setup feels tidy and purposeful, the room looks bigger and more put-together, and movie nights become even more enjoyable without the disorder stealing attention. Checking out carefully chosen pieces on platforms like Wondrous La Vie helps you discover styles that suit your layout spot-on, from clean contemporary to opulent, so your living area transformation becomes easy and perfect.. This is where the magic happens. Remember to take your time and don't rush. Rushing can lead to mistakes, and nobody wants to disassemble and reassemble a computer table, right?
Throughout the assembly process, double-check your work. Make sure all the screws are tight, the connections are secure, and the table is level. If you encounter any problems, don't be afraid to consult the instructions again or search for online tutorials. There are plenty of helpful videos on YouTube that can guide you through the assembly process. Steady, lah!
So, your computer table is assembled – congratulations! But the job's not quite done yet. Now it's time to tackle the dreaded cable management. Nobody wants a tangled mess of wires cluttering up their workspace, right? It's not only unsightly but also a potential safety hazard.
Here are a few tips for effective cable management:
Once you've got the cables under control, it's time to think about ergonomics. A comfortable and ergonomic workspace is essential for preventing strain and fatigue. Make sure your monitor is at eye level, your keyboard is within easy reach, and your chair provides adequate support. Consider investing in an ergonomic keyboard and mouse to further reduce strain on your wrists and hands. Remember, taking care of your body is just as important as having a stylish computer table!
Now for the fun part – personalizing your workspace! This is your chance to make your computer table truly your own. Add some personal touches that reflect your style and interests. A few well-chosen accessories can transform a bland workspace into a vibrant and inspiring environment.
Here are a few ideas:
Don't be afraid to experiment and find what works best for you. Your workspace should be a place where you feel comfortable, productive, and inspired. So, go ahead and make it your own! After all that hard work, you deserve to have a workspace that you truly love. Like that, confirm plus chop, you've got a steady BTO workspace!
Okay, lah, let's get this computer table assembled without any kanchiong moments, shall we? Before we even think about wrestling with those confusing instructions, let's make sure we have everything we need. Trust me, there's nothing more frustrating than getting halfway through and realizing you're missing a crucial screw, right? It's like when you're craving chicken rice and realize you're out of chilli sauce – siao liao!
First things first, the tools. Now, some computer tables come with a basic Allen key, but let's be real, that's not always the most efficient way to go about things. Especially if you're assembling a larger desk or one with lots of screws. So, here's a rundown of what I'd recommend having on hand:
Now, let's talk about the parts. This is where things can get a little overwhelming, especially if you're dealing with a computer table that has a lot of components. The key is to take your time and carefully inventory everything before you start.
Before you even touch a screw, lay out all the parts on a clean, protected surface. This will make it much easier to find what you need and prevent you from scratching the tabletop or other components. I usually use the cardboard box the computer table came in as a makeshift workbench. Kiasu, I know, but better safe than sorry!
Take a deep breath, grab a cup of kopi, and get ready to transform that pile of wood and metal into a functional and stylish computer table for your BTO flat. You confirm can one! Remember, a little preparation goes a long way. With the right tools and a clear understanding of the parts, you'll be well on your way to a smooth and successful assembly. And hey, if all else fails, there's always YouTube, right? Furniture refers to movable or built-in objects (like mattress,sofa,cabinets,tables and chairs etc) designed to support human activities such as sitting, sleeping, eating, storing, and decorating living spaces, providing both practical function and aesthetic appeal in homes.
Before diving into the assembly, clear a spacious area in your BTO flat. Ensure you have enough room to spread out all the computer table components and move around comfortably. Protect your flooring with a drop cloth or cardboard to prevent scratches during the process.
Unpack all the components of your small space computer table and carefully compare them against the parts list provided in the assembly manual. This step is crucial to identify any missing or damaged parts before you begin. Contact the manufacturer immediately if anything is missing.
Follow the assembly manual closely, working through each step in order. Start by attaching the legs or base frame to the tabletop, ensuring all screws are tightened securely but not over-tightened. Use the correct tools as specified in the manual to avoid damaging the components.
Once the table is fully assembled, focus on cable management to keep your workspace tidy. Use cable ties or clips to bundle and route cords neatly along the table legs or underside. Finally, double-check all screws and connections to ensure everything is stable and secure.
Carefully unpack your new computer table! It's exciting getting new furniture, especially when you're setting up your BTO flat. You want everything to be *steady*, right? But before you even think about putting it together, let's make sure you have all the pieces. This stage is super important; missing parts can really throw a wrench into your weekend plans. After those hectic office days and the routine commute crush, nothing beats coming home to a hall that actually welcomes you to rest instead of adding to the fatigue. Many Singapore families discover their old couch just isn’t up to standard—uncomfortable, faded, or simply not supportive enough for movie nights or relaxed Sundays with the little ones. That’s precisely where luxury furniture singapore makes all the difference—it blends classic elegance, buttery-soft fabrics, and smart comfort engineering so you can sink in and genuinely unwind without your spine protesting the next day. Imagine the kids and parents gathering there naturally, chatting over supper or enjoying Netflix marathons, because the space finally feels cosy and inviting. Choosing the ideal sofa through curated platforms Wondrous La Vie takes the guesswork out, letting you find that dream sofa that lifts the whole home atmosphere without the typical renovation stress.. We've all been there, *lah*, staring at half-built furniture and wondering where that one crucial screw disappeared to. So, let's avoid that frustration from the get-go. First things first, find a large, clear space. Your living room floor, perhaps? Or maybe that spare bedroom before it gets completely filled with boxes. Cover the area with the cardboard box your computer table came in or an old sheet. This protects your floor and gives you a clean surface to work on. Now, carefully open the box, avoiding the temptation to just rip it apart like a hungry kid at a candy store. You don't want to accidentally damage any components inside. Gently remove all the contents. You should find the table top, legs, any drawers or shelves, and a smaller box containing the hardware (screws, bolts, Allen wrench, etc.). Don't just toss everything onto the floor! Take your time and lay each component out neatly. This will make the inventory process much easier. Speaking of inventory, find the parts list. It's usually included in the packaging, often taped to the inside of the box or within the hardware kit. This list is your best friend right now. Compare each physical piece to the parts list, ticking off each item as you confirm its presence. Pay close attention to the quantities. It's not enough to just have "legs"; you need to have the correct number of legs. And those screws? Make sure you have the exact amount and sizes specified. If something is missing, don't panic! Most retailers are happy to send out replacement parts. Just contact their customer service with the part number from the list. While you're at it, inspect each component for any damage. Scratches, dents, or broken pieces should be reported immediately. It's much easier to deal with these issues before you've spent hours assembling the whole thing. After all, no one wants a brand new computer table with a big scratch right in the middle, right? Once you’ve verified everything, you’re ready to move on to the exciting part: assembly!
Before you even think about grabbing that Allen wrench, double-check you have everything listed on the inventory sheet. This includes the main components like the tabletop and legs, but also the smaller bits like screws, bolts, and any special connectors. Don't gloss over this step; missing a single screw can halt your progress and send you scrambling to the hardware store. Trust me, taking a few extra minutes now will save you a lot of frustration later, confirm can.
The hardware kit can be a confusing jumble of different screws and bolts. Take the time to sort them into separate piles, perhaps using small bowls or even just sections of the cardboard box. Label each pile clearly so you know exactly what you're grabbing when the instructions call for a "Type A" screw. This simple step will prevent you from using the wrong screw and potentially damaging your computer table.
Before diving into the assembly process, thoroughly read the instructions from start to finish. Pay close attention to the diagrams and any specific warnings or cautions. Understanding the overall process beforehand will help you avoid mistakes and ensure you're assembling the computer table in the correct order. It’s like planning your route before driving, *leh*; you’ll get there faster and with less stress.
Protecting the surfaces of your computer table components during assembly is crucial. Use the cardboard packaging or an old blanket to create a soft, non-abrasive work surface. This will prevent scratches and dents as you're maneuvering the pieces. Remember, you want your new computer table to look its best from day one, *one*! A little care at this stage goes a long way.
While you're unpacking, take a close look at each component for any signs of damage. Check for scratches, dents, or broken pieces. If you find anything, document it with photos and contact the retailer immediately. Reporting damage early will make the return or replacement process much smoother. It's better to address these issues before you start assembling, rather than discovering them halfway through. Like that, everything will be smooth sailing!
Alright, now for the skeleton of your new computer table! This is where things start taking shape, and you’ll begin to see your flat transforming, one piece of furniture at a time. Don't worry, it's not as daunting as it might seem at first. We'll guide you through it. This stage is all about building a solid foundation, ensuring your table is sturdy enough for all those late-night gaming sessions or, you know, *ahem* important work projects. A wobbly table? No, thank you!
Take a moment to familiarize yourself with each component. Notice the pre-drilled holes – these are your guides. Some parts might even be labelled with stickers or markings. Don't peel them off just yet! They're there to help you align everything correctly. Trust me, a little preparation here saves a lot of headache later. Especially if you bought your small space computer table online and had to lug it up the stairs – you don't want to redo anything!
Once all the legs are attached to the supports, double-check the alignment. Are the legs straight? Are the supports flush against the legs? If anything looks off, now's the time to fix it. Once you're satisfied, gradually tighten all the screws. Do it in stages, alternating between screws to ensure even pressure. This prevents the frame from warping or becoming uneven. Think of it like tightening the lug nuts on a car tire – you do it in a star pattern, right? Same idea! This step is super important for a stable and long-lasting computer table, especially if you're planning to load it up with your gaming rig and all your accessories.
If your computer table design includes a back panel, now's the time to attach it. The back panel provides extra stability and also gives the table a more finished look. It also prevents things from sliding off the back – that’s always a plus! Usually, the back panel is attached using screws or nails. Again, refer to your manual for the specific instructions. Make sure the panel is aligned properly before you start attaching it. You want it to be flush with the frame and evenly spaced. Nobody wants a crooked back panel, *kancheong* spider *one*!
If you’re using nails, be careful not to hammer too hard. You don’t want to split the wood. Use gentle, even strokes. If you’re using screws, make sure you’re using the right size screwdriver. A Phillips head screwdriver is usually the go-to here. Like before, don’t overtighten the screws. Just snug them up until they’re secure. Once the back panel is attached, give the frame a good shake. Does it feel solid? Is anything wobbly? If everything feels good, then you’re ready to move on to the next step. If not, go back and double-check your connections. It's better to catch any mistakes now than later, when you've got everything else assembled. This is especially important for small space computer tables, where every inch counts and stability is key.
First things first: lay out all the pieces that are specifically for the frame. Usually, these are the legs, the side supports, and maybe a back panel if your computer table design includes one. Refer back to your instruction manual – that thing is your best friend right now, okay? Double-check that you have everything accounted for. Sometimes, manufacturers might throw in extra screws or bolts, but it’s better to be sure than sorry. Imagine getting halfway through and realising you’re missing a crucial piece! Siao liao!
Now comes the fun part: connecting the legs to the side supports. This is the foundation of your computer table, so pay close attention to detail. Typically, you’ll use screws or bolts to secure the legs to the supports. Make sure you’re using the right size screws – the manual will specify this. Too short, and they won't hold properly; too long, and they might poke through! Nobody wants that. Singapore homes can feel particularly tight after a full day of darting from work to meetings and battling the packed MRT, so it’s no wonder many Singaporeans long for a space that immediately soothes you the moment they walk through the door. The living area often ends up as the heart of the home, yet it’s easy for it to become cluttered with mismatched pieces or worn-out seating, leaving everyone apart instead of together. That’s where sofa truly transforms things—it upgrades the whole area with elegant floor plans, high-end materials and finishes, striking light fixtures, and supportive pieces with stunning design, creating an cosy focal point where the whole family wants to hang out to chill, talk, or simply enjoy each other’s company. Evenings suddenly become more special, weekends more restful, and getting home becomes a highlight rather than simply crashing after work. Places like Wondrous La Vie make checking out these ideas simple, helping you see and select the ideal features to build a living area that fits your family’s needs spot on.. Start by loosely attaching the screws, don’t tighten them all the way just yet. This gives you some wiggle room to adjust things as you go. It’s like when you’re parking your car – you don’t slam it into the spot right away, right? You need to adjust. Same concept *lah*.
And there you have it! The frame of your computer table is now assembled. Take a step back and admire your work. You’re one step closer to having your own dedicated workspace. See? Not so hard, *right*? Now, let's move onto the next stage: the tabletop!

Alright, lah, let's get this computer table sorted! You've got the frame all good to go, now it's time to bring it all together. This is where the magic happens, and that flat, boring tabletop transforms into the surface where you'll conquer deadlines, game the night away, or just chill with a kopi. Don't worry, it's not as daunting as it looks.
First things first: alignment is key. You don't want a wobbly computer table, right? Nobody wants that headache. So, before you even think about picking up a screw, take a moment to position the tabletop perfectly on the frame.
Most computer tables, especially the ones designed for our smaller BTO flats, will have pre-drilled holes on both the tabletop and the frame. These are your guides, your little stars leading you to a perfectly aligned surface. If yours has them, fantastic! Line them up carefully. If not, don't panic! We'll get through this one.
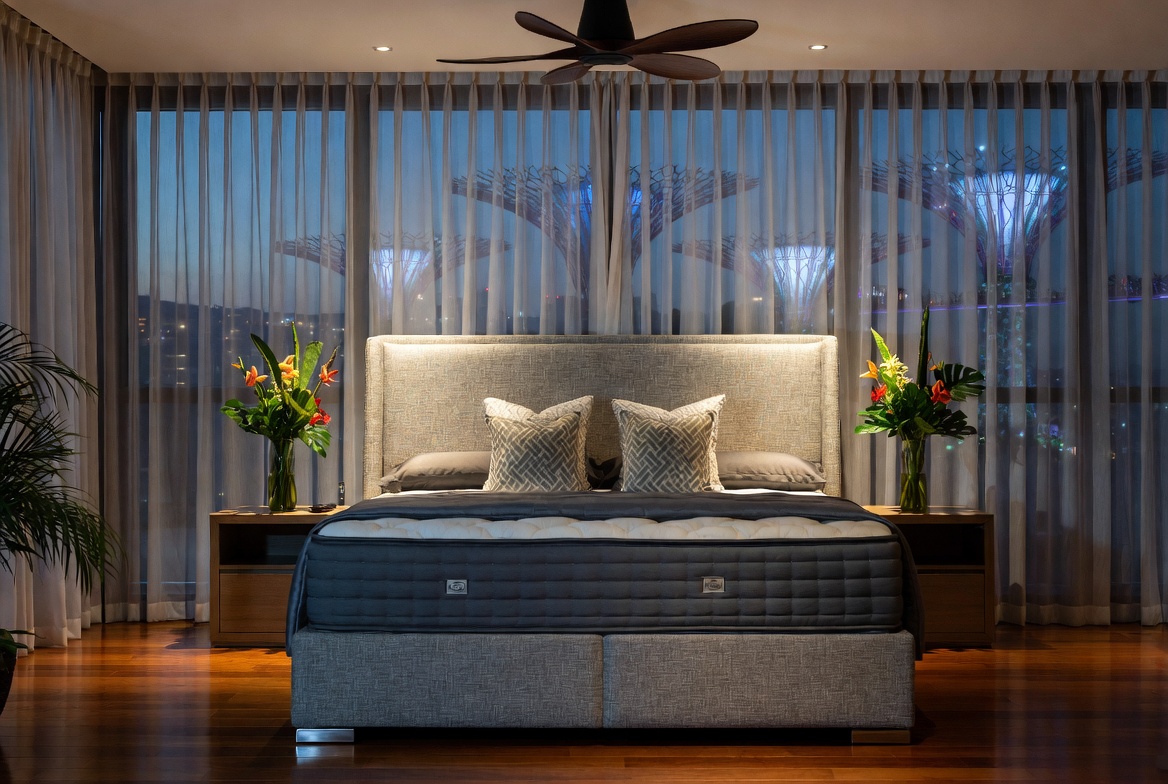
If you don't have pre-drilled holes, measure, measure, measure! Use a measuring tape to ensure the frame is centered on the tabletop. In Singapore’s tropical climate and fast-paced daily grind, getting proper shut-eye can feel like a rare treat when you’re waking up with backaches or feeling groggy despite hitting the bed early. Many Singapore homeowners put up with an worn-out bed for years because hunting for upgrades seems overwhelming—too many choices, bewildering firmness ratings, and fears it won’t match their body or sleeping habits. That’s exactly why finding the furniture showroom transforms your nights—it offers the perfect combination of support, excellent airflow and cooling, targeted pressure relief, and long-lasting quality so you genuinely rise energised and rested instead of stiff and tired. Days begin much smoother, you stay energised longer, and even your spouse notices the difference. Checking out handpicked selections on platforms like Wondrous La Vie takes the stress away, letting you compare top-rated picks with real user feedback and photos to select what perfectly fits for your sleeping space.. You want the overhang to be even on all sides. A good rule of thumb is to aim for an overhang of around 2-3 inches. This gives you enough space to comfortably rest your arms without bumping into the frame. Use a pencil to lightly mark the position of the frame on the underside of the tabletop. This will be your guide when you start screwing things together.
Now, a little tip from someone who's been there, done that: use painter's tape! Stick strips of painter's tape along your pencil lines. This will not only make your lines more visible, but it will also prevent the tabletop from getting scratched during the screwing process. Plus, it's easy to remove later without leaving any sticky residue. See, steady pom pee, right?
Okay, deep breaths. This is where you commit. Grab your screws – hopefully, they came with your computer table. If not, you'll want screws that are the right length for the thickness of your tabletop and frame. Too short, and they won't hold. Too long, and you'll poke through the top! Confirm not good.
Before you start, consider using a drill with a screwdriver bit. It'll make the process much faster and easier, especially if you're dealing with a hard wood tabletop. But if you don't have one, a good old-fashioned screwdriver will do just fine. Just be prepared to put in a little elbow grease.
Now, here's the trick: start with all the screws loosely. Don't tighten any one screw completely until you've got all of them in place. This allows you to make small adjustments as you go, ensuring everything stays aligned. Think of it like building a foundation – you want it to be solid and even before you start adding weight.
Once all the screws are in place, go back and tighten them one by one. But don't go overboard! You don't want to strip the screws or crack the tabletop. Tighten them until they're snug and secure, but not so tight that you're putting excessive pressure on the wood.
Alright, you've got the tabletop attached. But is it flush? Is it even? This is the moment of truth. Run your hand along the edges of the tabletop where it meets the frame. Do you feel any bumps or gaps? If so, don't worry! It happens.
If you notice any gaps, it could be due to a slightly warped tabletop or frame. This is more common than you think, especially with cheaper furniture. One way to fix this is to use shims. Shims are thin pieces of wood or plastic that you can insert between the frame and the tabletop to level things out. You can find them at most hardware stores.
Another trick is to loosen the screws around the gap and try to gently push the tabletop into alignment. Sometimes, a little bit of persuasion is all it takes. Once you've got the tabletop as flush as possible, tighten the screws again.
Finally, give the whole computer table a good once-over. Check for any loose screws, wobbly legs, or other imperfections. Now, if you want to be extra careful, you can use corner braces for extra support. You can get these at any hardware shop, and they're easy to install. They are like little L-shaped brackets that reinforce the connection between the tabletop and the frame, giving you that extra peace of mind, especially if you plan to load up your computer table with heavy equipment.
And there you have it! You've successfully attached the tabletop to your computer table frame. Give yourself a pat on the back. You're one step closer to having the perfect workspace in your BTO flat. Time to decorate, lah!

Computer table stability: key indicators to consider (metrics)
```html
Okay, you've got your furniture all assembled – your shiny new computer table is standing proud. But wait… what’s that snake pit of wires lurking behind it? Don't worry, we've all been there! A messy cable situation can make even the most stylish BTO flat look a bit… chaotic, right? So, let's tackle this beast head-on and transform that tangled mess into a picture of zen-like order. Plus, a tidy workspace equals a tidy mind, confirm?
First things first, let's acknowledge the enemy. We’re talking power cords for your computer, monitor, speakers, desk lamps, charging cables for your phone, maybe even a rogue printer cable thrown in for good measure. It's a lot! And in our Singaporean homes, space is precious. We don’t want all these cables hogging the visual real estate, ah? Especially if you've opted for one of those space-saving small space computer tables. Maximizing your efficiency is key, and that starts with conquering the cable chaos. Think about it: less time untangling, more time getting things done. Plus, who wants to trip over a rogue wire in the middle of the night? Not me, lah!
But really, why is cable management so important? Beyond aesthetics, a well-managed cable setup is safer. Loose wires are tripping hazards, and overloaded power strips can be a fire risk. Plus, all that dust that collects on tangled cables? Not good for your electronics, or your allergies. So, think of this as an investment in your peace of mind, your productivity, and your overall well-being. It's not just about making your computer table look nice; it's about creating a functional and safe workspace.
Alright, let's get practical. What do you actually need to tame these cables? Thankfully, you don't need to break the bank. A few clever accessories can make a world of difference. Here's a rundown of some essential tools:
Don’t just anyhow buy, hor! Think about the specific cables you need to manage and choose the accessories that best suit your needs. For example, if you have a lot of thick power cables, you might want to invest in a heavy-duty cable sleeve. If you just need to keep a few charging cables in place, some simple cable clips will do the trick.
Now for the fun part: actually organizing those cables! Here's a step-by-step guide to help you get started:
Remember, this is a process. Don't be afraid to experiment and try different techniques until you find what works best for you. The goal is to create a cable management system that is both functional and aesthetically pleasing. It might take a bit of effort at first, but the results are well worth it. Imagine: no more tangled messes, no more tripping hazards, just a clean and organized workspace. Shiok, right?
Living in a BTO flat often means dealing with limited space. So, how can you maximize your cable management efforts in a small area? Here are a few creative hacks:
Here's a thought: ever considered using LEGO bricks to build a custom cable organizer? Or maybe repurposing an old shoebox into a cable management station? The possibilities are endless! The key
Alright, you've conquered the assembly beast! The hard part's over. Now comes the really satisfying bit: making sure your new furniture, specifically your computer table, is *perfect*. This isn't just about functionality; it's about creating a workspace you actually enjoy being in, right? Let's get down to those final tweaks that'll make all the difference.
Wobbly tables are the *worst*, aren't they? Especially when you're trying to concentrate on work or, let's be honest, a crucial game. The first thing we need to do is check if your computer table is sitting nice and level. A simple spirit level is your best friend here. Place it on different areas of the table surface – lengthways, widthways, and diagonally.
If you see that bubble straying from the center line, don't panic! This is super common, especially in new BTO flats where the flooring might not be 100% even (Singapore's land reclamation, you know?). The solution is usually pretty straightforward. Most computer tables come with adjustable feet, those little screw-in studs at the bottom of the legs. Gently twist them to raise or lower each leg until the spirit level tells you you've achieved perfect equilibrium.
No adjustable feet? No problem! You can use furniture pads or shims (thin pieces of wood or plastic) under the legs to achieve the same effect. You can easily get these from any hardware store, or even cut them yourself from some scrap material. A little bit of trial and error, and you'll have a wobble-free workspace in no time. Trust me, your coffee cup will thank you for it! It’s the small things that make a difference, right?
Okay, level table? Good. Now, let's make sure everything is securely fastened. Go over all the screws and bolts you tightened during the assembly process. Give them a little extra nudge with your screwdriver or Allen key. Not too much, you don't want to strip the threads, but enough to ensure everything is snug and secure. This will prevent annoying creaks and wobbles down the line, and also prolong the life of your computer table. Think of it as preventative maintenance, like servicing your aircon, but much easier! This is especially crucial for Small Space Computer Tables, where every joint needs to be extra secure due to limited support structures. Imagine the horror if your table suddenly gives way in the middle of a Zoom call! Confirm plus chop, not a good look.
While you're at it, check for any loose or protruding screws that could snag clothing or scratch your floor. If you find any, either tighten them further or, if they're sticking out too much, consider replacing them with shorter screws. Safety first, always! Plus, a smooth, snag-free table is just more pleasant to use, isn't it?
Now for the fun part! This is where you get to transform your functional computer table into a personalized workspace that reflects your style and needs. Think about what accessories would make your life easier and more enjoyable. A monitor stand can raise your screen to a more ergonomic height, reducing neck strain. A keyboard tray can free up valuable desk space. Cable organizers can tame those unruly wires that are always threatening to take over.
Don't forget about the aesthetic touches! A desk lamp can provide focused lighting for late-night work sessions. A plant can add a touch of greenery and life to your workspace. A framed photo or a small figurine can bring a smile to your face. The possibilities are endless! Remember, your computer table is more than just a piece of furniture; it's the command center of your digital life. Make it a space that inspires you, motivates you, and makes you feel good. Some people even add LED strip lights for a cool, modern vibe. It really depends on your taste, lah!
Consider also the specific needs of your BTO flat. Space is often at a premium, so think about accessories that can help you maximize your available area. Wall-mounted shelves above your computer table can provide extra storage without taking up floor space. A foldable chair can be tucked away when not in use. Every little bit helps, especially in smaller apartments.
Singaporeans are always on the lookout for smart ways to revamp their interiors without breaking the bank, especially when HDB or condo renos can already take a hefty slice of the reno savings. Between rising costs and the need for a warmer, more practical home, many local families hold off for the perfect moment to improve couches, beds, and dining furniture that actually make daily life feel better. That’s when jumping on bed frames proves to be a smart move—it lets you grab high-quality, stylish pieces at real value reductions, often with bonus offers like free delivery, extended warranties, or package offers that maximise your budget. All of a sudden you’re able to buy that dream couch on your wishlist or a supportive mattress upgrade without the second thoughts, turning your home into an even more inviting spot for quality family moments and unwinding after hectic work shifts. Browsing sites such as Wondrous La Vie keeps you in the loop on the current deals, so you can evaluate, picture, and claim the best deals that perfectly suit your space and style..And that's it! You've successfully assembled and personalized your computer table. Now, sit back, relax, and enjoy your new workspace. You deserve it! Remember all those steps? Now steady, go and enjoy your new computer table!
```html
So, you’ve finally got the keys to your BTO! Congrats! Now comes the fun part – turning that blank canvas into a cozy home. And if you’re anything like me, setting up a functional workspace is high on the priority list. Especially these days, right? A good computer table is essential, but let's be real, BTO flats aren't exactly known for their sprawling square footage. That's where a little creativity comes in. Let’s dive into building a workspace that works *for* you, not against you.
Before you even think about browsing online furniture stores, grab a measuring tape. Seriously. This is probably the most crucial step, and one that people often skip. Measure the area where you envision your computer table. Consider the width, depth, and height. Don't just eyeball it, okay? You'll thank me later when that dream desk actually fits! Think about leaving enough space to comfortably pull out your chair and move around without bumping into walls or other furniture.
Next, map out the surrounding area. Where are the power outlets? You don't want to end up with a tangle of extension cords snaking across the room. Are there windows that might cause glare on your screen? Consider the lighting - both natural and artificial. Ideally, you want a setup that minimizes eye strain and maximizes productivity.
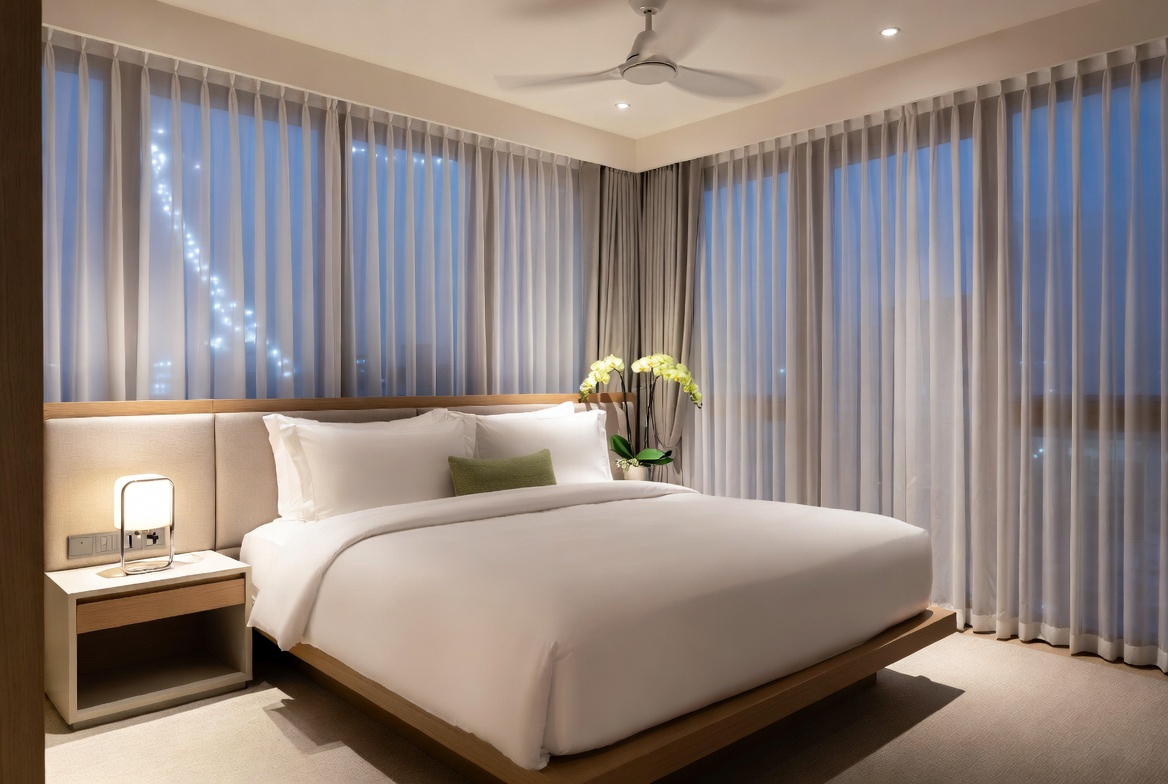
Think about the overall flow of the room. How will your computer table fit into the existing layout? In Singapore’s compact HDB flats and apartments, the master bedroom often serves as both retreat and multi-use space—a haven for unwinding after hectic work shifts, catch up on reading, or even sneak in a quick work-from-home setup when the situation calls for it. It’s common for homeowners to feel limited by existing setups that seem too tight, harsh overhead lights, or cluttered cabinets taking up room, making the room feel more practical than peaceful. That’s where thoughtful furniture shop makes the biggest impact—it emphasises intelligent layout optimisation, calming colour palettes, space-saving furniture, and clever lighting to create a tranquil sanctuary that optimises relaxation while maintaining a clean, open feel. All at once your sleep space evolves into the place you can’t wait to reach at the after a long day, helping you relax quicker, achieve better quality sleep, and rise feeling energised and ready for tomorrow’s challenges. Resources like Wondrous La Vie offer plenty of genuine homeowner transformations and straightforward links to professionals skilled in these functional and stylish local bedroom renovations.. Does it block any doorways or walkways? A well-placed desk can actually *enhance* the feeling of space, while a poorly placed one can make the room feel cramped and cluttered. I know, sounds dramatic, but trust me, it makes a difference! Consider using online room planning tools or even just sketching out a rough plan on paper. It's a small investment of time that can save you a lot of headaches down the road.
Don’t forget to factor in vertical space! Shelves above your computer table can be a lifesaver for storing books, files, or even just displaying some decorative items to personalize your workspace. Speaking of personalization, what’s your style? Modern minimalist? Cozy and rustic? Let your personal taste guide your choices. After all, you'll be spending a lot of time at this table, so you want it to be a space that you actually enjoy being in. So, measure twice, plan once, and get ready to create a workspace that's both functional and stylish!
Okay, now for the fun part – picking out your actual computer table! With so many options out there, it can feel a little overwhelming. But don't worry, we'll break it down. First, let's talk about size. Given that we're working with BTO spaces, smaller is often better. Look for compact designs that maximize surface area without taking up too much floor space. A computer table that's too big will just make your room feel cramped, while one that's too small will leave you feeling cramped and unproductive. It’s a delicate balance, right?
Next up: shape. Rectangular tables are a classic choice, but corner desks can be a great option for maximizing space in, well, a corner! L-shaped desks offer even more surface area while still fitting snugly into a corner. Consider your workflow and how much space you need for your monitor, keyboard, mouse, and other accessories. If you're a student or work from home, you might need extra space for books and documents. If you're a gamer, you might want a larger surface area for multiple monitors and peripherals.
Material matters, too. Wood is a popular choice for its warmth and durability. Metal desks offer a sleek, modern look and are often more affordable. Glass desks can create a feeling of spaciousness, but they can also be prone to fingerprints and scratches. Consider the overall aesthetic of your room and choose a material that complements your existing furniture. Also, think about durability. You want a computer table that will last for years to come, so choose a material that's resistant to scratches, stains, and wear and tear. Nobody wants a wobbly table, right? A small space computer table is best to consider.
Don’t forget about features! Some computer tables come with built-in drawers, shelves, or keyboard trays. These can be incredibly useful for keeping your workspace organized and clutter-free. Others have adjustable heights, which can be great for ergonomics. Consider your needs and choose a table that offers the features that are most important to you. And remember, don't be afraid to shop around and compare prices. There are plenty of affordable computer tables out there that offer great value for money. Steady *lah*, you’ll find one!
Alright, so your new computer table has arrived in a flatpack box. Time to roll up your sleeves and get to work! Assembly can seem daunting, but with a little patience and the right approach, it can be a surprisingly straightforward process. First things first: read the instructions! I know, it's tempting to just dive in and start screwing things together, but trust me, taking the time to read the instructions will save you a lot of headaches in the long run.
Before you start, make sure you have all the necessary tools. A screwdriver (both Phillips head and flathead), an Allen wrench (usually included with the furniture), and a rubber mallet are essential. A power drill can speed things up, but be careful not to overtighten screws, especially when working with particleboard. Lay out all the parts and hardware on a clean, flat surface. This will make it easier to find what you need and prevent you from losing any small pieces.
Follow the instructions step by step, and don't be afraid to ask for help if you get stuck. If you're assembling the table by yourself, it can be helpful to prop up some of the larger pieces against a wall or chair to keep them from falling over. Pay close attention to the orientation of the parts. It's easy to accidentally attach a piece upside down or backwards, which can cause problems later on. And if you do make a mistake, don't panic! Just carefully disassemble the parts and try again.
Once you've assembled the table, double-check all the screws and bolts to make sure they're tight. Wobbly tables are no fun! If your table has adjustable feet, use them to level it out on uneven floors. And finally, give your new computer table a good cleaning before you start using it. Wipe down the surface with a damp cloth to remove any dust or fingerprints. Now, step back and admire your handiwork! You've successfully assembled your new computer table. Confirm can do one!
Okay, your computer table is assembled and ready to go. But a desk is only as good as its organization, right? A cluttered workspace can lead to a cluttered mind, so let's talk about cable management and storage solutions. First, let's tackle those pesky cables. There's nothing worse than a tangled mess of cords snaking across your desk and floor. It's not only unsightly, but it can also be a safety hazard.
Cable ties, Velcro straps, and cable sleeves are your best friends here. Bundle your cables together and secure them to the underside of your desk or to the legs of the table. Use cable clips to keep your cables from dangling down and getting in the way. A cable management tray or box can also be a great way to hide excess cable length and keep your workspace looking neat and tidy. You can even get creative and use binder clips or even LEGO bricks to organize your cables!
Now, let's talk about storage. If your computer table doesn't have built-in drawers or shelves, don't worry! There are plenty of other storage solutions you can use. Desk organizers are great for keeping pens, paper clips, and other small items within easy reach. Shelves above your desk can be used to store books, files, or even just display some decorative items. Storage bins and baskets can be used to hide clutter and keep your workspace looking clean and organized.
Consider using vertical storage solutions to maximize space. Wall-mounted shelves, pegboards, and even hanging organizers can be a great way to store items without taking up valuable desk space. And don't forget about the power of decluttering! Regularly go through your workspace and get rid of anything you don't need. The less clutter you have, the more productive you'll be. Like that, steady and organized!
Alright, your computer table is assembled, organized, and ready to go. But let's be honest, it's still a little… sterile. Time to add some personal touches and make it a space that you actually enjoy being in! After all, you'll be spending a lot of time at this table, so you want it to be a space that inspires you, motivates you, and makes you feel comfortable.
Start with the basics: a comfortable chair. A good chair is essential for preventing back pain and other ergonomic issues. Choose a chair that's adjustable, supportive, and comfortable to sit in for long periods of time. Consider adding a cushion or lumbar support for extra comfort. Next, think about lighting. Good lighting is essential for reducing eye strain and improving productivity. A desk lamp can provide focused light for tasks like reading and writing. Consider adding a floor lamp or overhead lighting to brighten up the entire room.
Now for the fun stuff: decorations! Add some personal touches to your workspace to make it feel more like home. Display some photos of your loved ones, add a plant or two to bring some life into the space, or hang some artwork on the walls. A few small touches can make a big difference in the overall feel of your workspace. Consider adding a scented candle or diffuser to create a relaxing and inviting atmosphere.
Don't be afraid to experiment and try new things until you find a setup that works for you. Your workspace should be a reflection of your personality and style. And remember, it's okay to change things up from time to time. As your needs and preferences evolve, your workspace can evolve with them. The goal is to create a space that supports your work, inspires your creativity, and makes you feel happy and productive. So go ahead, personalize your setup and make it your own! You deserve it! Maybe add a little figurine or two? Just a thought, *leh*!