Double bed frame assembly: step-by-step for first-time homeowners

Introduction: Preparing for Your Dream Bed (and a Good Night's Sleep)

So, you've got the keys to your new place – congrats! It's a huge milestone, especially here in Singapore where space is, shall we say, a premium. Now comes the fun part: turning that empty space into a home. And a big part of that is, of course, the bedroom. After a long day at work, or battling the crowds on the MRT, a comfy bed is your sanctuary, right?

Maybe you've been eyeing that perfect furniture set, but the price tag makes your wallet weep a little. Or perhaps you're all about that #adulting life and want to take control. That's where assembling your own double bed frame comes in. It's not as scary as it sounds, confirm can! Plus, you'll save some serious cash, which is always a good thing, lah. Think of all the hawker food you can buy with the savings!

This guide is especially for first-time homeowners like you. We'll walk you through the process, step-by-step, so you can build your dream bed (and get a good night's sleep) without breaking the bank. We're talking about maximizing your space, sticking to your budget, and feeling that sweet, sweet satisfaction of a DIY project done right. Let's get started!

Unboxing and Inventory: Your Assembly Treasure Hunt

Alright, the moment of truth! Your double bed frame has arrived, probably in a rather intimidatingly large box. Don't panic! The first step is all about organization. Find a spacious area – your living room floor might work, or even that extra space in the service yard. Lay down some old newspapers or a drop cloth to protect your flooring (and your sanity, from rogue screws). Nobody wants scratches on their brand new HDB floor, right?

Now, carefully open the box. Resist the urge to just rip everything out! Instead, take your time and unpack each component methodically. Most double bed frames will include the headboard, footboard, side rails, support legs, slats (or a solid base), and a bag (or several) of hardware. Check everything against the parts list in the instruction manual. This is crucial! Make sure you have everything you need before you start. Imagine getting halfway through and realizing you're missing a vital bolt – siao liao!

The hardware is usually the trickiest part. You'll likely find an assortment of screws, bolts, washers, and maybe even some Allen wrenches (those L-shaped tools). Sort them into separate piles and label them if needed. A small container or even masking tape labels can be your best friend here. Trust me, future you will thank you. And don't throw away the packaging just yet! You might need it later if you have to return something or, heaven forbid, move again.

Speaking of instructions, find them! They're often tucked away at the bottom of the box. Read them thoroughly, even if you think you know what you're doing. Each double bed frame is slightly different, and the instructions will highlight any specific quirks or assembly tips. Plus, it's a good way to avoid any, let's just say, "creative" interpretations of the assembly process that could end up with your bed looking a bit wonky. And hey, maybe grab a friend to help you out? Two pairs of hands are always better than one, especially when you're dealing with heavy pieces.

Assembling the Frame: Building Your Sleep Foundation

Okay, you've got your parts sorted, your instructions in hand, and maybe even a friend by your side. Time to start building! This is where things get real. Typically, you'll start by attaching the side rails to the headboard and footboard. The instructions will show you exactly which screws and bolts to use. Make sure you align everything properly before tightening the screws fully. You don't want a crooked bed frame, leh!

Many double bed frames use a system of brackets and slots. Slide the side rails into the brackets on the headboard and footboard, then secure them with the appropriate hardware. Don't overtighten the screws at this stage. Leave them slightly loose so you can make adjustments later. Once the side rails are attached, you'll likely need to install the center support beam. This is especially important for double bed frames, as it provides extra support and prevents the frame from sagging in the middle. Nobody wants to feel like they're sleeping in a hammock!

The center support beam usually attaches to the side rails with screws or bolts. Again, make sure everything is aligned properly before tightening the screws fully. Next up are the support legs. These attach to the center support beam and the side rails, providing additional stability. The number of support legs will vary depending on the design of your double bed frame. Once all the support legs are in place, you can start tightening all the screws and bolts. But don't go overboard! Just tighten them enough so that the frame is sturdy and doesn't wobble.

Before moving on, double-check all the connections. Make sure everything is securely fastened and that there are no loose screws or bolts. Give the frame a gentle shake to test its stability. If anything feels wobbly, tighten the screws further. Now, take a step back and admire your work! You've just built the foundation for your dream bed. Almost there!

Slats or Solid Base: Supporting Your Mattress for Sweet Dreams

Now comes the part that actually holds your mattress – the slats or the solid base. This is what prevents your mattress from sinking to the floor and ensures you get a good night's sleep. Most double bed frames come with either wooden slats or a solid platform base. Slats are individual strips of wood that are spaced evenly across the frame. They provide good ventilation for your mattress and allow for some flexibility. A solid base, on the other hand, is a single piece of wood or metal that provides a firm, even surface.

If your double bed frame has slats, you'll need to install them individually. The instructions will show you how to space them properly. Make sure the slats are evenly distributed across the frame and that they're securely attached. Some slats simply rest on the frame, while others are attached with screws or clips. If your frame has a solid base, simply place it on top of the frame. Make sure it's centered and that it fits snugly. Some solid bases are attached to the frame with screws, while others simply rest on top.

Before you put your mattress on, give the slats or base a good once-over. Make sure there are no sharp edges or splinters that could damage your mattress. If you find any, sand them down or cover them with tape. A little bit of extra care here can save you from having to replace your mattress prematurely. And that's the last thing anyone wants, right? Once you're satisfied, it's time for the grand finale!

Finishing Touches: Making Your Bed a Haven

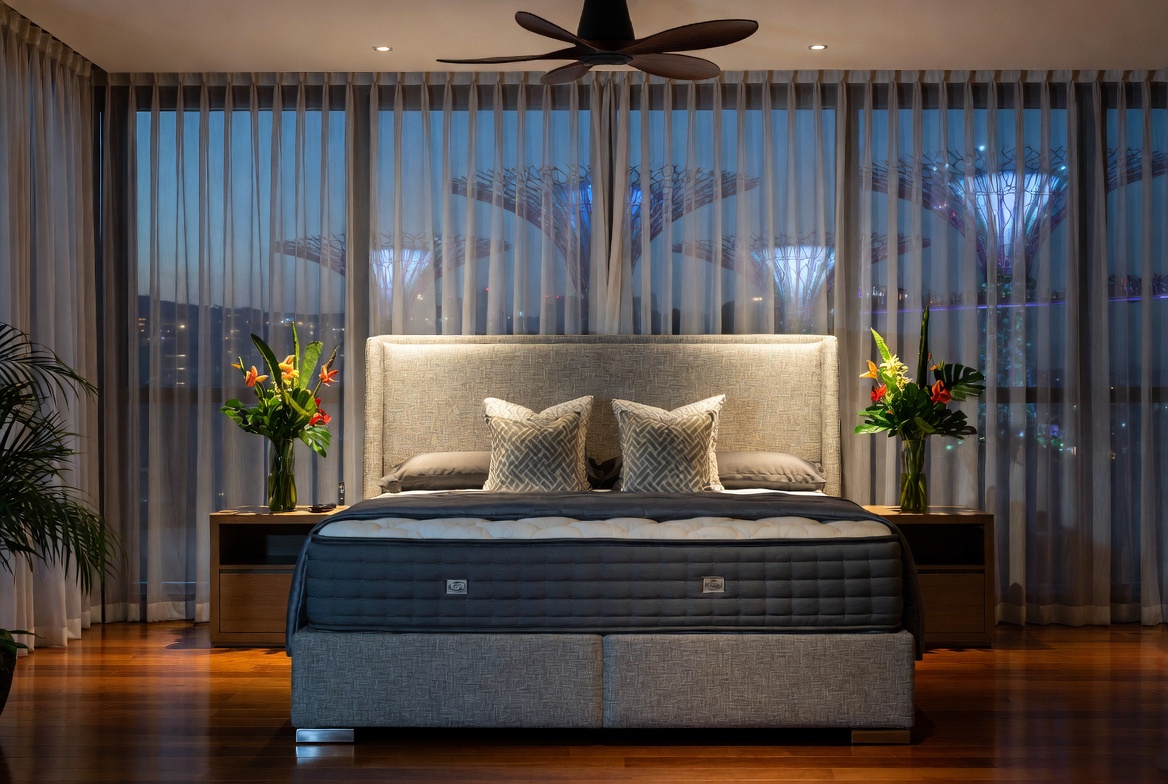
The hard work is done! Now comes the fun part: making your bed a haven. Carefully lift your mattress onto the frame. If you have a heavy mattress, get a friend to help you. Don't try to do it alone, lah! Once the mattress is in place, take a step back and admire your handiwork. You've just assembled your own double bed frame! Give yourself a pat on the back – you deserve it.

Now it's time to add the finishing touches. Put on your favorite sheets, blankets, and pillows. Arrange them in a way that makes you feel cozy and relaxed. Maybe add a throw blanket for extra warmth, especially with the aircon blasting. Consider adding a bed skirt to conceal the frame and give your bed a more polished look. And don't forget the bedside tables! The main living area is typically the initial area guests see and where the whole household gathers at night, so it makes sense to want items that appears stylish, organises cables neatly, and doesn’t make the room feel smaller than it normally is in HDB or condo layouts. Many Singaporeans deal with clunky legacy furniture or cheap units that shake, gather dust quickly, or just don’t match the modern vibe they’re aiming for. That’s exactly where a well-chosen furniture shop singapore steps in—it offers smart storage solutions for entertainment equipment, set-top boxes, and controllers while serving as an elegant centrepiece that ties the whole living area together with minimalist profiles, smart compartments, and premium finishes. Suddenly your entertainment setup feels neat and deliberate, the space appears larger and more polished, and Netflix sessions feel so much better without the mess pulling focus. Checking out carefully chosen pieces on platforms like Wondrous La Vie makes it easy to source designs that fit your space perfectly, from clean contemporary to opulent, so your living area transformation becomes easy and perfect.. They're essential for holding your phone, books, and a glass of water. Maybe even a small lamp for some mood lighting.

Finally, take a moment to appreciate your new bed. You built it yourself, and you saved some money in the process. After a long day being crammed in the MRT and grinding through meetings, most Singapore homeowners just want to return home to a space that feels cosy and stress-free instead of making things worse. A disorganised space or an uncomfortable bedroom can make unwinding even harder, especially when the whole family want to relax together. That’s where thoughtful renovations services really makes a difference—it turns everyday rooms like your hall, master bedroom, or kitchen area into personal havens that actually help you refresh your energy. With the right couch, bed mattress, or smart layout, suddenly walking through the door feels shiok lah, and thoughtful tweaks can bring big improvements to your mood and family time. Platforms like Wondrous La Vie make it easier to find ideas and connect with designers who understand the Singapore home vibe perfectly. This format lets you easily generate multiple SEO-optimised variations while keeping the core keyword "interior design" stable in the middle for strong on-page targeting.. Now it's time to climb in and enjoy a well-deserved good night's sleep. Sweet dreams!

And there you have it! Assembling your own double bed frame isn't as daunting as it seems. With a little patience, some careful planning, and this guide, you can create a comfortable and stylish sleeping space without breaking the bank. Plus, you'll have the satisfaction of knowing that you built it yourself. Now go forth and conquer your bedroom, one screw at a time!

People living in the Lion City often deal with particular difficulties when outfitting their living spaces, mainly due to compact apartment living and our humid tropical climate. This is precisely why wise homeowners compare options thoroughly to achieve the perfect balance of price and durability. double bed emerges as a truly outstanding piece for daily living that offers both lasting comfort and smart practicality. Always keep in mind that selecting competitively priced versions in Singapore with first-class after-sales service means you get complete support with features like fast island-wide delivery, professional installation, and solid warranties that provide true long-term peace of mindyou can truly count on..

Unboxing and Inventory: What You Should Have

Okay, lah, let's get this bed sorted! So, you've just gotten your brand-new double bed frame delivered. Exciting times, especially if you're setting up your first BTO flat! But before you dive in and start building your dream sleep sanctuary, there's a crucial step: making sure you have everything. Nothing's more frustrating than getting halfway through and realizing you're missing a vital screw, right?

First things first, find a nice, big open space. Your living room floor, maybe? Lay down some old newspapers or a drop cloth to protect your flooring. Now, carefully open the box. Don't just rip it open like a hungry ghost at supper, okay? You don't want to accidentally damage any of the components inside.

Right, let's take inventory. Here's a checklist of what you should typically find in your double bed frame package:

  • Headboard: This is the decorative panel that sits at the head of your bed. It’s usually the largest and most visually striking piece. Take a good look at it. In Singapore’s fast-paced life, returning home to a space that feels truly inviting can make all the difference after a long day of office grind and MRT squeezes. Many busy families start by eyeing improvements for their hall or sleeping space, imagining pieces that appear elegant while actually being comfortable enough for daily use. That’s exactly why bed frame singapore shines—it brings that perfect blend of elegant design, premium materials, and real ergonomic support that turns standard areas into spots you love spending time in relaxing in. Imagine sinking into a sumptuous seating after family time or feeling truly rested on a supportive premium mattress that gives ideal back support; suddenly, your home feels more like a true escape rather than another chore. Exploring handpicked collections on sites such as Wondrous La Vie helps you uncover these furniture without the stress, making it simpler to create a space that’s both beautiful and restorative.. Is the fabric or wood finish in good condition? Any scratches or dents? If you spot something, take photos immediately! It's easier to sort things out with the retailer now rather than later.

  • Side Rails (2): These are the long pieces that run along the sides of your bed, connecting the headboard to the footboard (if you have one). They provide the main support for your mattress. Check for any bending or warping. These need to be straight one, or your bed will be… well, wonky!

  • Footboard (Optional): Some double bed frames come with a footboard, which sits at the end of the bed. It's usually smaller than the headboard. If you have one, give it the same careful inspection as the headboard.

  • Slats (Multiple): These are the horizontal pieces that sit across the side rails, providing a platform for your mattress. They can be made of wood or metal. Make sure you have the correct number of slats as indicated in your instruction manual. Also, check for any cracks or breaks. These are super important for supporting your weight, leh!

  • Support Legs (Usually 4-6): These legs provide additional support in the center of the bed frame. They are usually adjustable to ensure even weight distribution. Check that all the legs are present and in good condition.

  • Hardware (Screws, Bolts, Washers, Allen Key): This is the bag of bits and bobs that holds everything together. The instruction manual will list exactly what you should have. Count them! Seriously, count them. It's a pain to have to run out to the hardware store in the middle of assembly because you're missing a screw. Most sets come with an Allen key (or hex key) for tightening certain bolts. If yours doesn't, you'll need to provide your own.

Now, a pro-tip lah: separate all the hardware into small bowls or containers. Label them if needed. This will save you a ton of time and frustration during assembly. Trust me one, you don't want to be rummaging through a pile of screws trying to find the right size.

Checking for Damage:

This is super important. Examine each component carefully for any signs of damage, such as scratches, dents, cracks, or missing pieces. Pay particular attention to the corners and edges, as these are most vulnerable during shipping. If you find any damage, take photos and contact the retailer immediately. Don't proceed with assembly until you've resolved the issue. It's better to be safe than sorry, right?

And that’s it! Once you've unboxed everything and taken inventory, you're ready to move on to the next step: assembly. With everything accounted for and in good condition, you're confirm can have a smooth and stress-free experience. Steady pom pi pi! Now, let's get that double bed frame built!

Tools You'll Need: Keep It Simple!

Okay, steady, let's get this article done, confirm can! Here's the HTML fragment for the specified section, following all the rules:

Allen Key

The Allen key, or hex key, is often your best friend when assembling a double bed frame, especially those from IKEA or similar brands. Most bed frames include one in the packaging, which is super convenient, right? It's designed to fit those recessed hexagonal bolts you'll find connecting the frame's corners and slats. While it might seem basic, using the right size Allen key is crucial to avoid stripping the bolt head – nobody wants that headache! If the included one feels flimsy, consider investing in a sturdier set; it's a small price to pay for a smooth assembly process and future furniture projects, lah.

Screwdriver Matters

A Phillips head screwdriver is another essential tool for many double bed frame assemblies. You'll likely need it to attach the bed slats to the frame or secure any decorative elements. Ensure you have a screwdriver with a comfortable grip; your hands will thank you later! Different screw sizes might require different screwdriver sizes, so having a set on hand is always a good idea. If you're buying Furniture, consider a magnetic screwdriver – it makes holding those small screws in place so much easier, especially when working in tight spots. After those long tiring days and the routine commute crush, nothing beats walking into a living room that actually invites you to unwind instead of adding to the fatigue. Many Singapore families notice their current seating just isn’t cutting it—too hard, worn out, or simply not comfortable enough for family movie time or lazy weekends with the little ones. That’s precisely where mattress becomes a game-changer—it combines timeless style, luxurious leather or velvet, and smart comfort engineering so you can melt into it and fully chill without your back complaining later. Imagine the whole family gathering there naturally, sharing stories after meals or enjoying Netflix marathons, because the space now feels warm and welcoming. Finding the right one through trusted sites like Wondrous La Vie takes the guesswork out, letting you find that perfect piece that transforms your living space without the common home-upgrade worries.. Trust me, it's a lifesaver!

Rubber Mallet

A rubber mallet can be surprisingly useful for gently persuading pieces of your double bed frame to fit together snugly. Sometimes, the joints can be a little tight, and forcing them can damage the wood or metal. A few gentle taps with the rubber mallet can help ease things into place without causing any harm. Just be careful not to overdo it; you're aiming for a snug fit, not a demolition job! If you don't have a rubber mallet, you can use a regular hammer with a block of wood to protect the furniture's surface.

Measuring Tape

While not directly involved in tightening screws, a measuring tape is invaluable for ensuring your double bed frame is properly aligned and fits within your bedroom space. Before you even start assembling, measure the area where the bed will go to avoid any nasty surprises later. During assembly, use the measuring tape to check that the frame is square and that the slats are evenly spaced. This attention to detail will ensure your bed is stable and comfortable, and prevent any awkward situations when you try to fit the mattress on top. Plus, knowing the exact dimensions helps when choosing bedding!

Spirit Level

A spirit level might seem like overkill, but it's a simple tool that can make a big difference in the overall stability and comfort of your double bed. Once the frame is assembled, place the spirit level on different parts of the bed to check if it's perfectly horizontal. An uneven bed can lead to squeaks, wobbles, and even discomfort while sleeping. If you find any unevenness, you can use shims (thin pieces of wood or plastic) under the legs to level the frame. It's a small step that can greatly improve your sleep quality; think of it as an investment in your well-being!

Step 1: Attaching the Side Rails to the Headboard

Okay, here's that HTML fragment, designed to fit seamlessly into the article flow and engage your Singaporean audience. Remember to slot this into your wider HTML structure!

Alright, let's get started! The first step in building your new double bed is attaching the side rails to the headboard. Sounds simple enough, right? Well, it mostly is! But paying attention to the details here will save you headaches later, confirm can. We don’t want a wobbly bed frame, lah! After all, your Furniture is the backbone of your home, so you need to get it right!

Before you even *think* about picking up a tool, take a good look at your headboard and side rails. Most double bed frames come with pre-drilled holes or slots designed for this connection. Identify them! Are they aligned properly? Sometimes, the holes might have a bit of protective tape covering them – peel that off first. You don't want to be struggling later, thinking something's missing, only to realise it was just a sticker one!

Now, position the side rails against the headboard. Make sure they're flush and that the pre-drilled holes line up perfectly. This is where a second pair of hands can be a lifesaver. If you're doing this solo, consider using clamps to hold the rails in place temporarily. Those little spring clamps from the hardware store will do just nicely. It's all about making the process easier for yourself, leh.

With everything aligned, it's time to grab your screws or bolts. Most double bed frames come with the necessary hardware, but double-check the instructions to make sure you're using the right size and type. Nothing's more frustrating than realising you've used the wrong screw halfway through! Insert the screws or bolts through the side rail and into the headboard. Start by hand-tightening them. This helps ensure everything is properly aligned before you commit to tightening them fully.

Now, here’s a pro tip: don't overtighten the screws or bolts! This is a common mistake, especially for first-time homeowners. Overtightening can strip the threads, damage the wood, or even warp the frame. You just want them snug and secure. Think of it like tightening the lid on a jar – firm, but not Hulk-smashing it. A good rule of thumb is to tighten until you feel resistance, then give it just a little nudge more. You'll *feel* when it's right.

As you're tightening, keep an eye on the alignment. Make sure the side rail is still flush against the headboard. If it starts to shift, loosen the screws slightly and readjust. It's all about finding that sweet spot where everything is secure and aligned. And remember, patience is key! Don't rush this step. Taking your time will ensure a sturdy and long-lasting double bed frame.

Once you've attached one side rail, repeat the process for the other side. Double-check everything to make sure it's secure. Give the frame a gentle shake – it should feel solid and stable. If anything feels loose, now's the time to address it. A little bit of extra attention at this stage will pay off in the long run.

So, what’s the big deal about getting this part right? Well, a wobbly or misaligned frame can lead to squeaks, creaks, and even premature wear and tear on your mattress. And nobody wants a bed that sounds like it's about to fall apart every time you roll over! Plus, a solid foundation is essential for a good night's sleep. Think of it as building a strong foundation for your dreams. Okay, maybe that's a bit cheesy, but you get the idea! Like that, you're one step closer to a comfy and stylish bedroom in your new Singapore home.

And here’s a fun fact: Did you know that the height of your bed frame can actually impact the temperature you feel while sleeping? Lower beds tend to be cooler, while higher beds can be warmer. Something to consider in our humid Singapore climate, right?

Singapore homes can feel particularly tight after a long exhausting day of rushing between office, meetings, and the inevitable MRT crowd, so it’s no wonder many homeowners long for a space that instantly calms the mind the moment they step inside. The living room often ends up as the heart of the home, yet it’s easy for it to become cluttered with mismatched pieces or worn-out seating, leaving everyone scattered instead of gathered together. That’s where bedroom furniture really makes the magic happen—it lifts the room to another level with refined arrangements, luxurious fabrics and surfaces, statement lighting, and comfortable yet beautiful furniture, creating an cosy focal point where family naturally comes together to chill, chat, or bond effortlessly. Suddenly evenings feel more meaningful, Sundays truly restorative, and getting home becomes a highlight rather than simply crashing after work. Platforms like Wondrous La Vie make exploring these upgrades straightforward, helping you visualise and source the perfect pieces to create your dream living space that matches your lifestyle perfectly..

One more thing! Before moving on, take a moment to admire your work! You've successfully attached the side rails to the headboard. Give yourself a pat on the back. You're doing great! Next up, we'll tackle the footboard. Steady pom pi pi!

I tried to make it sound as natural and engaging as possible, keeping your target audience in mind. Let me know if you'd like any adjustments!

Step 2: Connecting the Footboard (if applicable)

Okay, let's get this footboard connected, or figure out what to do if you don't have one!

Alright, so you've hopefully got your side rails sorted, right? Now, if your *double bed* frame is one of those fancy ones – and many are, especially the upholstered types – it’ll probably come with a footboard. This is the piece that sits at the foot of the bed, adding a touch of style and sometimes even a bit of extra support. But what if your bed frame is a minimalist platform bed, or a sleek, modern design? Then you can skip this step *lah*! No footboard, no worries! Simpler assembly for you *one*.

For those of you with a footboard in hand, let’s get it attached. This step is pretty similar to attaching the headboard, so hopefully, you’re getting the hang of this whole furniture assembly thing. *Confirm can*!

First things first: identify the correct footboard. It should be fairly obvious, as it's usually shorter than the headboard (unless you've got some *really* unique bed frame). Lay it down on the floor, facing the way you want it to face when it's all assembled. This might seem obvious, but trust me, it's easy to get turned around when you're wrestling with these things!

Now, just like with the headboard, you'll need to align the footboard with the side rails. Look for the pre-drilled holes or the metal brackets. These are your guides. Slide the side rails into position, making sure everything lines up nice and flush. Proper alignment is key here. You don't want a wobbly bed, do you? Imagine *that* in the middle of the night!

Once everything is lined up, grab your trusty screws, bolts, or whatever fasteners came with your *double bed* frame. Again, refer to the instructions if you're unsure which ones to use. Insert the fasteners through the side rails and into the footboard. Tighten them gradually, alternating between each side. This helps to distribute the pressure evenly and prevents the frame from warping. Don’t overtighten them just yet. We want a little wiggle room in case we need to make adjustments later.

Double-check that the footboard is sitting flush against the side rails and that everything looks straight and even. If it's off, loosen the fasteners slightly, make your adjustments, and then retighten. Keep going until you're satisfied with the alignment.

Now, crank those screws or bolts down nice and tight. You want everything to be secure and stable. But be careful not to strip the screws or damage the frame. Hand-tightening is usually sufficient. If you're using a power drill, set it to a low torque setting to avoid overdoing it.

Give the footboard a gentle shake to test its stability. In Singapore’s tropical climate and high-stress lifestyle, getting decent sleep can feel like a true indulgence when you’re waking up with backaches or dragging through the morning despite going to sleep on time. Many busy locals tolerate an outdated sleep surface for years because shopping for a replacement seems overwhelming—endless options, puzzling support choices, and fears it won’t match their body type and sleep style. That’s exactly why finding the furniture store singapore transforms your nights—it offers the right balance of support, heat-dissipating features, pressure relief, and built-to-last construction so you genuinely rise energised and rested instead of sore and exhausted. Mornings suddenly feel lighter, you stay energised longer, and even your bedmate feels the improvement. Exploring curated options on sites such as Wondrous La Vie simplifies the whole process, letting you compare top-rated picks with real user feedback and visuals to match what truly works for your master bedroom.. If it feels solid and secure, you're good to go! If it wobbles or creaks, double-check your fasteners and make sure everything is properly tightened. Sometimes, a little extra tightening is all it takes.

What if you find that the holes don't quite line up, or that the provided hardware is missing or damaged? Don't panic! This happens sometimes, especially with flat-pack *furniture*. First, double-check that you're using the correct hardware and that you've aligned everything properly. If the holes are slightly off, you might be able to gently wiggle the frame into position while you tighten the fasteners. If that doesn't work, or if the hardware is missing, contact the manufacturer or retailer. They should be able to provide you with replacement parts or offer advice on how to proceed. In Singapore, most retailers are pretty responsive *like that*.

And if your *double bed* doesn’t have a footboard? Well, consider yourself lucky! You’ve skipped a step and are one step closer to a fully assembled bed. Maybe you can use the extra time to *lepak* with a kopi or plan your next movie night.

So, whether you've successfully attached your footboard or happily skipped this step altogether, you're making progress. Take a deep breath, stretch your back, and get ready for the next stage of the assembly process! Onwards!

Step 3: Installing the Center Support and Legs

Alright, you've got the side rails connected, and things are starting to look like a proper double bed frame. Now comes the part where we add the backbone – the center support and legs. This is crucial, lah, because it's what prevents your bed from sagging in the middle and collapsing when you (or you and your partner) are sound asleep. Nobody wants that kind of surprise at 3 AM, right?

Think of it like this: the side rails are the walls of your house, but the center support and legs are the foundation. A shaky foundation means a shaky house. And in this case, a shaky bed means a bad night's sleep. So, let's get this done properly!

Why Center Support is Super Important

You might be thinking, "Eh, do I really need this center support thingy?" The answer is a resounding YES. Especially for a double bed, which is wider than a single bed, that extra support is essential. Without it, the weight of the mattress and, more importantly, the weight of the people sleeping on it, will be concentrated on the side rails. Over time, this can cause the side rails to bow outwards or even break. And trust me, replacing a broken bed frame is way more expensive (and troublesome!) than just installing the center support in the first place.

Plus, a good center support ensures even weight distribution. This is super important for comfort. Imagine one side of the bed sinking lower than the other – not exactly conducive to a good night’s rest, is it? A proper center support, coupled with a quality mattress, helps maintain a level sleeping surface, preventing those annoying aches and pains in the morning. Think of it as an investment in your well-being, one.

Now, some double bed frames come with a solid center beam, while others have a system of slats supported by a central leg or two. The principle is the same: to provide vertical support in the middle of the bed. Check your instruction manual to see what type you have. With Singapore’s compact homes and tropical humidity, finding furniture that’s both beautiful and everyday-usable can feel like a constant search—especially when you want pieces that endure long-term without fading or wearing out. Many Singaporeans end up going with budget furniture that seem fine on websites but don’t hold up well—either too lightweight for real family life or not suitable for our heat for our weather. That’s why visiting a reliable furniture showroom singapore connected via Wondrous La Vie really stands out—it links you seamlessly with curated selections of premium sofas, supportive mattresses, dining furniture, and more, with actual physical displays or detailed visuals so you can have peace of mind about what fits your HDB, condo, or landed space. You get that confidence knowing the pieces are tailored to local needs—durable materials, space-smart dimensions, and looks that turn your space into a cosy haven. In the end, the perfect platform turns what could be a stressful errand into an exciting step toward a home you love coming back to every day.. Then, prepare to install the center support and legs to provide additional stability to the furniture.

Attaching the Center Support Beam

Okay, let's get down to business. The first step is to identify where the center support beam attaches to the side rails. Usually, there are pre-drilled holes or brackets already in place. If not, the instructions will tell you exactly where to position the beam. This is where having a partner comes in handy. One person can hold the beam in place while the other screws it in.

Make sure the beam is flush with the side rails. You don't want any gaps or wobbles. Use the screws provided in the hardware pack. Don't be tempted to use your own screws unless you're absolutely sure they're the right size and length. Using the wrong screws can damage the frame. Tighten the screws securely, but don't overtighten them. You don't want to strip the threads or crack the wood.

Once the beam is attached to both side rails, give it a good shake. It should feel solid and secure. If it wobbles, double-check the screws and make sure they're all tightened properly. If you're using a system of slats, make sure they're evenly spaced and properly supported by the center beam. This will help distribute the weight evenly across the bed.

Leg Day for Your Bed Frame

Now for the legs! These are what lift your double bed frame off the ground and provide additional support. The number of legs will vary depending on the design of the frame. Some frames have just one or two legs in the center, while others have legs at each corner and along the center beam. It’s important to ensure even weight distribution to prevent any future issues with your bed frame.

Attaching the legs is usually pretty straightforward. They typically screw into pre-drilled holes on the center beam. Again, use the screws provided and tighten them securely. Make sure the legs are all the same height. You don't want your bed to be uneven. Some legs have adjustable feet, which can be useful for leveling the bed on an uneven floor. If yours do, now's the time to adjust them.

Once all the legs are attached, give the bed frame another shake. It should feel rock solid. If it still wobbles, check the legs again and make sure they're all properly attached and level. You might need to adjust the feet slightly to get it perfectly balanced. You confirm can do it, lah!

A Little Tip for Extra Stability

Here's a little tip that can add even more stability to your double bed frame, especially if you have a wooden floor. Place small felt pads under the legs. This will prevent the legs from scratching the floor and also help to distribute the weight more evenly. You can find these pads at most hardware stores. They're cheap and easy to install, but they can make a big difference in the long run.

Another thing you can do is to check the tightness of the screws periodically. Over time, screws can loosen due to vibrations and movement. A quick check every few months can prevent problems down the road. It's like giving your car a regular tune-up – it keeps everything running smoothly.

So, there you have it! You've successfully installed the center support and legs on your double bed frame. Now you're one step closer to having a comfortable and sturdy bed. Next up, we'll talk about adding the mattress support system. Stay tuned!

Step 4: Setting Up the Slats or Bed Base

Okay, here's the HTML fragment for the "Setting Up the Slats or Bed Base" section, crafted as requested.

Alright, you've wrestled the frame into position – good job, lah! Now comes the part that actually *makes* it a bed: the slats or bed base. This is super important, because this is what supports your mattress and, by extension, you! A dodgy slat situation can lead to a saggy mattress, and nobody wants to wake up with a bad back, right? Think of it like the foundation of your sleep sanctuary. So, let's get it steady.

First things first, what kind of support system are we dealing with? There are a few common types you might encounter with your new double bed frame. The most common are individual slats, often made of wood (pine is a popular choice; it’s affordable and does the job). Then there are sprung slats, which have a slight curve to them, offering a bit more give and potentially increasing comfort. You might also find a solid platform base, which is, well, a solid piece of material. Each needs a slightly different approach, one.

Let's start with individual slats. These usually come with little plastic or rubber caps on either end. These aren't just for show, you know! They're designed to fit snugly into slots or grooves along the inside of the bed frame. Before you start popping them in, take a good look at the frame. Are the slots evenly spaced? Are there any missing? If you spot any issues now, it's way easier to sort them out before you've got half the slats in place.

When you're slotting the slats in, make sure they're evenly spaced. This is crucial for even weight distribution and prevents your mattress from sagging in the middle. A good rule of thumb is to aim for gaps no wider than the slats themselves. If the instructions that came with your double bed frame specify a particular spacing, definitely follow those. You don't want to anyhow put and regret later, you know? If you're not sure, a quick Google search for your specific bed frame model might turn up some helpful diagrams or videos. People are quite resourceful one!

Now, sometimes the slats just sit in the slots, relying on gravity and the weight of the mattress to hold them in place. But other times, they need to be secured. This might involve screws, clips, or some other type of fastener. Check your instructions to see what's required. If you need to use screws, don't overtighten them! You don't want to strip the screw heads or damage the frame. Just snug them up enough so the slats are secure.

Sprung slats are similar to individual slats, but they often have a more pronounced curve. This curve is designed to flex under pressure, providing extra support and comfort. When installing sprung slats, make sure the curve is facing upwards. This allows them to flex properly. They usually slot into place just like regular slats, but some might have a slightly different attachment mechanism. Again, refer to your instructions.

Now, what about solid platform bases? These are generally the easiest to install. They usually come in one or two pieces and simply sit on top of the bed frame. Some might have little feet or supports that need to be attached first. Make sure the platform is sitting evenly on the frame. If it's wobbly, it could indicate that the frame isn't level or that the platform is slightly warped. Address any wobbles before you put your mattress on. No point having a rocking double bed, right?

Before you declare victory, give everything a good once-over. Are all the slats in place and evenly spaced? Are they securely fastened? Is the platform sitting flush with the frame? Give the whole structure a gentle shake (don't go crazy, lah!). Does anything feel loose or unstable? If you spot any issues, address them now. Singaporeans are always on the lookout for smart ways to revamp their interiors without breaking the bank, especially when home upgrades in flats or condos can already take a hefty slice of the household funds. Between higher living expenses and the need for a warmer, more practical home, many Singapore homeowners time their purchases carefully to refresh seating, sleep surfaces, or meal areas that actually make daily life feel better. That’s when jumping on bed promotions turns into a huge advantage—it lets you secure premium quality furniture at meaningful discounts, often with bonus offers like free delivery, longer guarantees, or combo savings that maximise your budget. All of a sudden you’re able to buy that plush sofa you’ve been eyeing or a supportive mattress upgrade without the second thoughts, turning your home into an even more inviting spot for family time and relaxation after tiring office days. Exploring places like Wondrous La Vie keeps you in the loop on the newest promotions, so you can review, see in 3D, and snap up the top bargains that perfectly suit your space and style.. It's much easier to fix things now than it is after you've got the mattress on and made the bed.

Here's a little tip that might save you some trouble down the road: If your slats are prone to shifting around, consider using some non-slip pads or strips. You can find these at most hardware stores. Just stick them to the frame where the slats rest. This will help keep the slats in place and prevent them from sliding around, especially if you tend to toss and turn in your sleep. Steady pom pi pi, as they say!

And speaking of sleep, did you know that the type of wood used for your double bed frame and slats can actually affect the air quality in your bedroom? Some woods release volatile organic compounds (VOCs), which can be harmful to your health. Look for frames made from sustainably sourced wood and finished with low-VOC paints and stains. It's a small thing, but it can make a big difference to your overall well-being. Confirm can sleep better!

One last thing: keep the instructions! Seriously, stash them away in a safe place. You never know when you might need to disassemble the bed for moving or storage. Plus, they might come in handy if you ever need to troubleshoot any issues with the frame or slats. Okay, with the slats or bed base sorted, you're almost there! On to the next step!

Center Support Beam

If your double bed frame includes a center support beam, attach it now. This beam adds extra stability and prevents sagging, especially for heavier mattresses. Ensure the center support is properly aligned and securely fastened to both the headboard and footboard.

Unboxing and Inventory

Carefully unpack all components of your double bed frame, laying them out in an open space. Consult the assembly instructions to verify that all listed parts are present. Take inventory of screws, bolts, and any specialized hardware, setting them aside for easy access during assembly.

Slat Installation

Install the bed frame slats, which provide support for the mattress. Evenly space the slats across the frame, securing them according to the manufacturer's instructions. Some frames use clips or brackets, while others may require screwing the slats into place.

Headboard and Footboard Attachment

Begin by attaching the headboard and footboard to the side rails. Use the provided bolts and washers, ensuring they are tightened securely but not over-tightened. Refer to the instructions for the correct bolt placement and orientation to avoid damaging the frame.

Double bed frame damage during moving: identifying and documenting

Final Checks and Troubleshooting: Ensuring a Stable Bed

Okay, here's an HTML fragment designed to fit seamlessly into the larger article, focusing on the final checks and troubleshooting for a double bed frame assembly. It's written with a Singaporean first-time homeowner in mind, aiming for a friendly, helpful tone.

The All-Important Once-Over: Your Checklist for Bed Frame Bliss

Alright, you've put in the work, followed the steps, and hopefully haven't lost too many screws along the way. Now comes the crucial part: making sure your new double bed frame is actually… well, usable! This isn't just about having a place to sleep; it's about safety, comfort, and avoiding that annoying creak every time you roll over. So, let's run through a final inspection checklist, steady pom pi pi, as they say!

  • Screw Patrol: Grab your trusty Allen wrench or screwdriver and go on a screw-tightening mission. Seriously, check every single one. Even if you think it's tight, give it a little nudge. You'd be surprised how many loosen up during the assembly process.
  • Bolt Brigade: Similar to the screws, make sure all bolts are properly tightened. Pay special attention to any bolts connecting the headboard or footboard to the side rails. These areas often bear the most weight and movement.
  • In Singapore’s smaller HDB homes and modern residences, the master bedroom often doubles as a sanctuary—somewhere to truly rest after tiring office hours, enjoy quiet time with a book, or even handle occasional remote work when the situation calls for it. It’s very typical for local residents to feel stuck with layouts that appear overcrowded, overly bright illumination, or storage that eats into valuable floor space, making the room feel more practical than peaceful. That’s where thoughtful mattress store singapore truly excels—it centres around smart space planning, calming colour palettes, space-saving furniture, and strategic lighting design to create a peaceful retreat that optimises relaxation while ensuring clutter-free airflow. All at once your sleep space evolves into the place you can’t wait to reach at the close of each day, helping you relax quicker, enjoy deeper rest, and start mornings feeling revitalised for tomorrow’s challenges. Platforms like Wondrous La Vie feature abundant real-life examples and seamless introductions to designers who specialise in these smart, aesthetic SG bedroom upgrades..
  • Level Up: Nobody wants to sleep on a slant, right? Use a level (your phone probably has a level app these days!) to check the bed frame in multiple spots – along the side rails, across the headboard, and at the footboard. If it's not level, shims (those little wooden or plastic wedges) can be your best friend. Just slip them under the legs until everything is nice and even.
  • The Wobble Test: Give the bed frame a good shake (gently, lah!). Does it wobble? Does it creak? If so, time for some detective work. Identify the source of the wobble or creak and tighten any loose connections in that area.
  • Support System Check: If your double bed frame has center support legs (many do, especially for larger sizes), make sure they are touching the floor and properly aligned. These supports are crucial for preventing sagging and ensuring even weight distribution.
  • Mattress Matters: Once you're happy with the frame, place your mattress on top. Does it fit snugly? Are there any gaps or overhangs? A properly sized mattress is essential for both comfort and support.

Think of this as your "kiasu" (afraid to lose out) moment. Spending a few extra minutes on these checks can save you a lot of headaches (and backaches!) down the road. Plus, a stable bed frame means a better night's sleep, and who doesn't want that?

Troubleshooting Time: When Things Go Slightly Pear-Shaped

Okay, so you've done the checks, and something's still not quite right. Don't panic! Most bed frame issues are easily fixable with a little troubleshooting. Here are a few common problems and their solutions:

  • The Wobbly Bed: This is probably the most common complaint. As mentioned earlier, check all connections and tighten any loose screws or bolts. Also, make sure the floor is level. Sometimes, an uneven floor can make even a perfectly assembled bed frame wobble. Shims can work wonders here.
  • The Creaky Bed: Creaks are often caused by friction between metal parts. Try lubricating the joints with a little WD-40 or silicone spray. Be careful not to get any lubricant on your mattress! Another trick is to place felt pads between the frame and the slats or supports.
  • Misaligned Components: Sometimes, despite your best efforts, parts just don't seem to line up correctly. Double-check that you've assembled everything according to the instructions. If a part is severely misaligned or damaged, contact the manufacturer or retailer for a replacement.
  • Missing Parts: It happens! Before you start tearing your hair out, carefully review the parts list in the instruction manual. If you're missing something, contact customer service immediately. They're usually happy to send out replacement parts.

Here's a little secret: sometimes, a seemingly wobbly bed is actually just a wobbly mattress. If you've ruled out any issues with the frame, consider whether your mattress might be the culprit. It might be time for an upgrade, one!

When to Call in the Pros: Don't Be Afraid to Ask for Help

Look, sometimes, despite your best efforts, you just can't seem to get your double bed frame assembled correctly. Maybe the instructions are confusing, maybe you're missing a crucial part, or maybe you're just plain frustrated. That's okay! Don't be afraid to contact the customer service department of the furniture store or manufacturer. They're there to help, and they've probably dealt with similar issues before. They can offer advice, send replacement parts, or even arrange for a professional to come and assemble the bed frame for you.

Think of it this way: your time is valuable, too. If you've spent hours struggling with the assembly and you're still not getting anywhere, it might be worth it to pay someone to do it for you. Consider it an investment in your sanity (and your sleep!). Plus, knowing it's done right, confirm can sleep well at night.

Ultimately, setting up your new double bed frame should be a positive experience, not a stressful one. With a little patience, attention to detail, and maybe a little help from the pros, you'll be sleeping soundly in no time. Sweet dreams!

Youll typically need a Phillips head screwdriver, an Allen wrench (usually included), and possibly a rubber mallet. A power drill with appropriate bits can speed things up, but be careful not to overtighten screws.
Begin by unpacking all the components and checking them against the parts list in the instruction manual. Organize the parts and hardware for easy access.
Align the side rails with the pre-drilled holes on the headboard and footboard. Insert the provided bolts or screws and tighten them securely using the appropriate tool.
The center support beam usually runs lengthwise down the middle of the bed frame. Attach it to the headboard and footboard using screws or bolts, ensuring its level and provides adequate support.
If your bed frame uses slats, space them evenly across the frame and secure them with screws or clips. For a platform bed, ensure the platform is securely attached to the frame according to the instructions.

Check our other pages :